
My Ideas for Displaying & Saving Kids Artwork
Last week I finished photographing around three years worth of artwork and the resulting images are all now stored nice and neat on my hard drive. Whilst this is great as it means it is all backed up - and out of the way - I don't really like having things just stored digitally. For me the whole point of keeping these is so that they can be enjoyed in years to come, but also in the here and now - people don't generally flip through a hard drive in quite the same way!
So, I had two goals in mind when photographing the artwork - Firstly to have it out on display, and secondly to have it saved for long term, but in an accessible way. Here's what I've done so far...

First up is the display part.
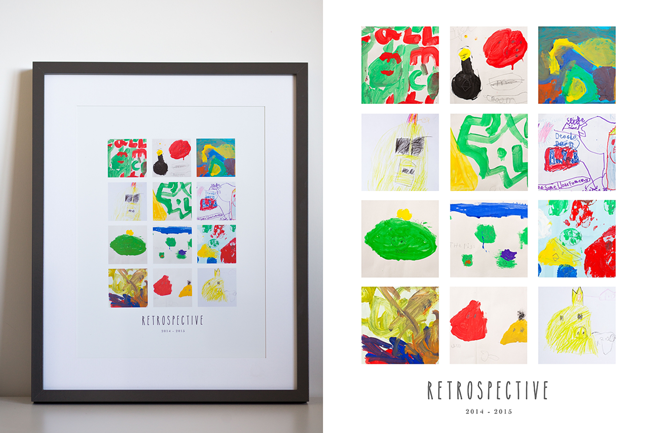
The first thing I did was create this collage using a template I made a couple of years ago (you can download this for free on the FREEBIES page if you want to use it) and simply clipping in the photographed artwork to the template. You will need Photoshop or Photoshop Elements to use this - if you are unsure how to clip in image, I have a step by step tutorial here for adding images to a photoshop template to help. Mine is just printed out at home and in a gray high gloss RIBBA frame from IKEA. (Alternatively, instead of using a collage, you could frame the artwork individually and group lots of them together to create a gallery wall)
The second display uses this hanging line frame that I have had for ages now (I bought it at the same time as the white version which I used for my Baby Keepsake Frame) and have never got around to using it until now. Apart from the fact I think it looks great, I love it because it only took me around 10 minutes to do, which is always a bonus - simply print out the photographed artwork into small prints of varying sizes and clip them onto the wire. (You can also change the background from black to white, just by flipping the back over - I like the black as I think it makes the colours "pop" a bit more, but both look equally good)


Alternatively, simply put up some string or wire and use mini clothes pegs to clip the art / prints to it. You could do this vertically or horizontally to fit your space. IKEA's wire curtain rod works really well for this and is inexpensive. You can this in action here.

So, that's what I've done with the display part (and hopefully given you some other similar ideas too)
Now, onto the second goal, which was to archive the photographed artwork in some way - again, not on a hard drive (can you tell I have a thing about images only being stored on hard drives?!) The original plan had simply been to create a printed photo book of just the drawings and paintings (you can see some ideas for these at the end of this post) so that it was all neat and tidy, in one place and, of course, beautifully presented. However, somewhere along the way, this idea morphed into doing a "school years" album, due to the fact that along with all the painting and drawings that he came home from school with, there was also certificates for various achievements, plus photos that the school had taken on their outings: all which I needed to do something with too. So, to incorporate all this AND allow me to have a place to keep any items that I'm just too sentimental about to throw out - I decided to use an album with photo sleeve / page protectors instead.
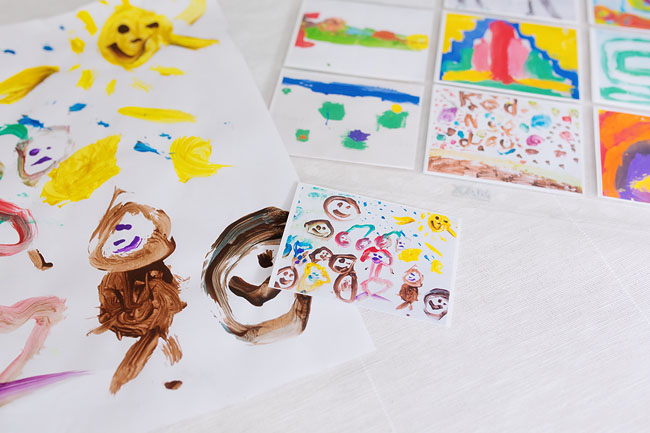
I printed out the artwork pics into small baseball card sizes, and put them into the page protectors - you an see a couple of these below.

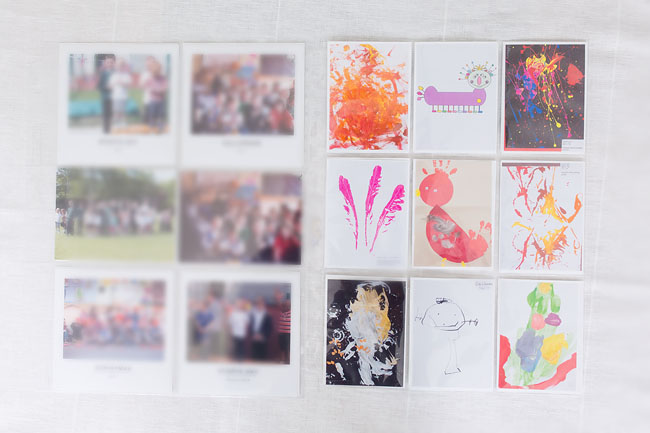
Mixed in with the artwork is certificates, photos taken at school outings, along with some official school class pictures - all printed out in much smaller sizes (on photo paper) so that they save space and fit inside the protectors.
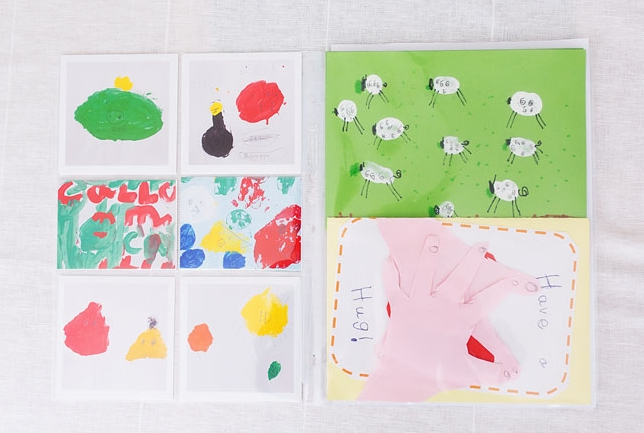
I intend to buy some envelope pages, where I'll keep some of the things that I don't want to throw out, or are just better seen in their original form - like my "Have a Hug" Car (already missing one finger)! At this moment these are just in the open single page protectors that came with the album (page on the right above) but I want to make sure that nothing can slip out.

I love this way of storing everything, and I'm really pleased about how it has turned out. But mainly I appreciate the fact that I can show this to family (Grandparents love this sort of thing!) and also so that I can just keep adding to it as I go along, something I wouldn't have been able to do with a printed book. (That said, I still have everything on my hard drive so if I change my mind in the future, it's all still accessible)
(NB You could also see this recent post by Estelle, about how she scrapbooks using Project Life - you could easily incorporate artwork into something like this too)

As I mentioned above, creating a printed photo book is a great idea, and I have seen some amazing ones over the last little while. Check out Creative Green Living- Kids Artwork Books or Zig and Zag Blog - Book of School Projects or Artifact Uprising Art Book (see left) which all have good examples.
However, just a simple binder to hold original artwork, organised into years as in Make Life Lovely is a great solution to keeping it tidy, but not having to go through the bother of photographing or scanning the artwork in the first place!
I hope this has given you some ideas on what to do with your kid's artwork, both for getting out on display and for archiving it for the future!
