10 Ways to Improve your Photography This Weekend
No matter where we are in our photography journey, I'm willing to bet that there are always ways to improve what we do or how we do it!
Although everyone reading this will be at different stages along the road - and even on different paths - I created this post to give you some ideas of the areas you can work on this weekend regardless of where you are.
To make this blog post as ACTIONABLE as possible, each of these suggestions has links to further reading, so you can literally pick a topic, and start to put it into practice right away!
Let's get crackin'.....


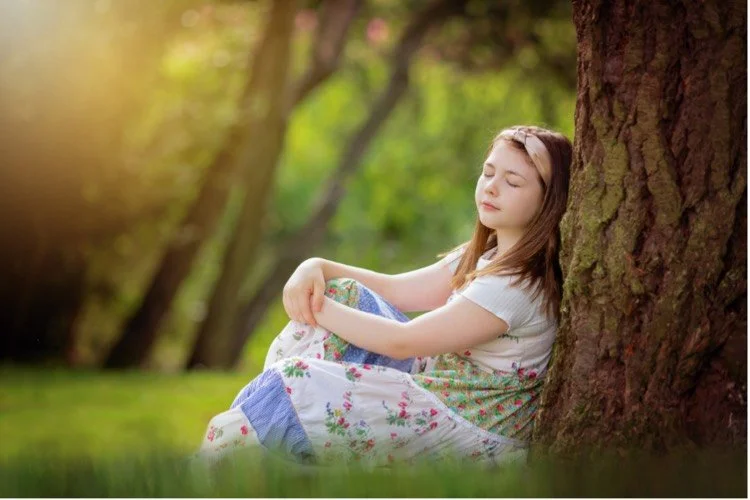
1. Become an Observer of Light
Light is everything in photography. The word photography literally means “painting with light”, and I’m not sure there is anything more important, as without it, we simply can't make an image!
For a couple of years my main concern was making sure I got ENOUGH light to work in – having a Canon Rebel as your camera does that to you as you can only push your ISO so far until you need to start introducing flash or have a very grainy image! But now I love shooting in low light, full sun, or any other type that gets thrown my way, and my images look SO much better for it.
If you are starting out, start by shooting indoors, an look for areas that have plenty of light coming in as you are going to find it much easier to work with.
Once you have that down, move outdoors, and experiment with open shade, full sun, and cloudy days. Move back indoors and start using directional light (light that hits your subject at an angle) or find pockets of light, or low light - there is so much to learn, so pick one, and start to practice!
DO THIS:
This weekend, try working with light that you have never worked with before. Use iPad light, torch light, light during the golden hour, or use light that you would normally avoid (like midday sun) and learn how best to work with it. You could even break out the flash if you have one!
FURTHER READING:
How to Find and Use Open Shade for Better Portraits
2. Know what you want to shoot
Talking from experience here, when you are just starting out you are photographing anything and everything at any time and at any place. And that’s how it should be! However, when you are ready to move on, it helps to get purposeful.
To do that you need to decide what to shoot ahead of time. Try visualizing your image BEFORE you take it – what does it look like? What perspective are you using? What light? Having an idea in your head (which may or may not transfer itself into your screen!) will help you get the images you dream of.
DO THIS:
Dream up your ideal image or session. What does it look like? Where does it take place? Who is in it? Write it down and sketch it out. Take the idea out of your head and onto paper - that way you'll be much more likely to act on it.
Stuck? Have a look on Pinterest and see if you can find an image that inspires you and take it from there! I've linked to my board for Child Photography Inspiration to help, so check it out first (and of course be sure to follow whilst you're there!)
FURTHER READING:
Child Photography Inspiration (Pinterest)

3. Use Different Composition Tools
Composition is nothing more than the art of arranging the various elements within your scene so that they draw your viewer through the image in the way you want them to view it, or to evoke a feeling or mood.
There are loads of different compositional tools at your disposal (and when you find one you will usually find a rule that is in direct contradiction to the first rule!)
My advice is take one compositional tools and practice one only for a week. Even if you know all about the various forms of composition, go back to the beginning and start again from there – you’ll be amazed what you pick up the second time around.
DO THIS:
Pick a compositional tool – Rule of Thirds, Lines, Color etc, and work on introducing it to your images this weekend. You'll see some suggestions below!
FURTHER READING:
3 Simple Ways to Add Depth To Your Photos

4. Shoot in a Different Exposure Mode
If you are still on AUTO, then the very thing you must do as soon as you can is move away from it! Although there is a decent chance that your camera will expose for the scene correctly in AUTO, other times it will get it very, very (very) wrong.
Getting the correct exposure is just just ONE reason to take control of your camera - it’s only by taking FULL control that you can determine the final “look” of your image. You need to tell the camera how much of your scene to show as sharp focus, where to blur, how much to blur, whether to show motion or freeze, or even whether to show grain or not. Without taking control of your camera, you will not be able to control the final image.
We really go into this in depth (along with all the elements of a successful image) in the Auto to Awesome e-course, so if you feel like your camera is controlling you instead of the other way around, check it out.
DO THIS:
If you are shooting in AUTO, move onto AV mode. If you are in AV mode, shoot in manual! If you are already comfortable shooting in manual, why not try some creative exposure? Under or over expose and see what type of results you get, or use a high ISO to introduce grain or intentionally get motion blur.
FURTHER READING:
A Step By Step Guide to Shooting in Aperture Priority Mode
How to photograph movement with motion blur
10 Things You'll Wish You Knew About Shooting In Manual Mode

5. Shoot in RAW
When I look back on my images there are two changes I made that instantly stand out, because I can tell when I made the switch. The first was when I started shooting in full manual mode, and the second was when I switched to RAW.
I shot on JPEG for quite some time, because the large file sizes and increased editing that went with the territory of RAW files put me off. I still curse both to this day, but it is a trade off I will endure as shooting in RAW is another thing that gives you CONTROL - and I believe ultimately improves your images. (That said, I feel duty bound to say that there are a couple of amazing photographers that shoot in JPEG - but I would only advise this if you are getting great shots in camera already!)
DO THIS:
Make the switch to RAW this weekend if you are currently shooting in JPEG - you will need a RAW image processor like Adobe Lightroom or Photoshop Elements to process the files though, so make sure you have one of these already! If you already shoot in RAW, challenge yourself to getting the image correct in camera.
FURTHER READING:
RAW vs JPEG - Which is right for you?

6. Learn a Different Editing Technique (or try something new)
I love editing my photos, and I think wherever you are in your photography journey there will be something new to learn and try!
Although for the majority of my images I just do a quick edit (due to the number of images I take vs the number of free hours I get) nearly every one gets a little bit of a polish.
If you are just starting out, first of all, please don’t compare your images to a professional photographers final image. Many, MANY times there has been a lot of work done to the image in processing to get it to look that way!
Start off by learning the basics – at least how to crop, straighten, fix WB, exposure, add contrast and saturation to give your images a boost.
Already got that down? Then try something else – add color tones to your images, or textures – there’s nothing more fun than having a ‘play” in Lightroom or Photoshop!
Even if you don’t apply what you have learnt to every image, you can pull some amazing things out of the bag on images that you really want the best on.
DO THIS:
Take some images into your favourite editing program and play with them! If you are new to editing, just work out how to make basic adjustments., but if you are an experienced editor, try doing something totally different or use a tool that you don't know how to work!
FURTHER READING:
7 Deadly Photo Editing Sins (and how to avoid them)
5 Tips for How to Remain Consistent When Editing
5 Simple Ways to Enhance Your Photos in Lightroom

7. Search out a Great Background
The holy grail of successful images is having a great subject and a great background.
Don’t just settle for the local park or playground all the time – try to find new and interesting places to shoot.
Look for creative elements you can use in your images in, or interesting backdrops, or just places that are free from distractions. Look in and around your home, or drive around the neighbourhood and look for great locations to use. It could be a brightly colored door, a graffitied wall, a tree lined path, a patch of ground with no distracting elements in the background, or simply a place of outstanding natural beauty.
DO THIS:
Take your camera and a notebook and drive around your area (or just wander around your home) Look for places that you think will have a great background and take a picture of them, and add the details to your notebook so you have a list of locations to try out!
FURTHER READING:
6 Ways to Shoot Around Household Clutter for A Professional Look

8. Know your Lenses/ Equipment
If you have more than one lens then a great trick is to spend at least a week with just one of your lenses strapped to your camera, and don't change it.
Understand what it does your subject, what it does to your background, how much you can fit in the frame, or how it squeezes elements further apart or brings them closer.
Break the “rules” of that lens – use a wide angle for a fun portrait or take your 135mm lens indoors.
If you are in a photography rut, you might even want to try out a new lens, it's amazing how different the world can appear through a new lens and therefore revitalise your photography!
DO THIS:
Take off your favourite lens and put something else on your camera for a bit. See what it does to the background, where you need to stand, how much you can fit in the frame etc. If you already know your lenses inside out, why not rent a lens for a weekend, or an underwater housing, or a flash, and try something new.
FURTHER READING:
Tips for Using the Canon 50mm F1.8 Lens

9. Read a Photography Book / Take a Course
I can think of no better way to spend a Sunday than curled up with a good photography book. I don't think I have ever read one without coming away with something - either a new piece of information or just an idea to try.
But if you are really serious about improving your skills, then a course is the way to go. That way you have all the information laid out before you in a LOGICAL sequence, where each piece of information links to the last. It's by far the quickest way to reach your goal!
If you are still using ANY of the AUTO modes on your camera, then my Auto to Awesome course will have a huge impact on your images, and since it is online and self paced, you can get started any time you like - even this weekend :)
DO THIS:
If you are just starting out in photography, or you are a little further along but not getting the images you can see in your head, then spend the weekend finding a course that suits you.
If you are further along, grab a photography book that you have lying on the shelf, or order a new one, and read a chapter. Whilst doing so, make a note of an image that you want to try, or a composition tool, or just use it for inspiration!
FURTHER READING:
Get our FREE 90 Day Photography Learning Blueprint
Watch our FREE Lightroom Classic Masterclass “How to Use Lightroom Like a Pro”

10. Shoot from the Heart / Start a Personal Project
For a long time I would try to take images of things that didn’t move me or speak to me in any way. Whilst I still sometimes take images for other reasons, it's when I see something that makes my little heart sing and I am able to capture it the way I see it that I get an image that I treasure. This can vary from day to day and from hour to hour: It could be the way the light has captured a spiders web. It could be the way my son looks at me with innocence and trust. It could be the fun and laughter of childhood. It could be as simple as the little smile on my face when he hangs up his cowboy hat before leaving for school. Photograph what makes your heart sing on that given day and capture it.
DO THIS:
Don’t shoot just with the technicalities in your head. Shoot what you love – this image never needs to make it on your walls or into your portfolio and doesn't need to be shared with a group, or even your partner.. Take an image this weekend that is just for YOU. If you are stuck, perhaps consider a personal project to get you started.
FURTHER READING:
12 Types of Photography Projects and Creative Exercises You can Do

As always, thank you so much for reading this post and generally for being here. If you have friends, family or colleagues who would find this tutorial helpful, or you just want to keep it as a reference point for later, then be sure to pin to your Pinterest boards 💖