
How To Choose Your Camera Settings in Manual Mode (with examples!)
One of the things I get asked a lot is how to choose your settings when shooting in Manual Mode on your DSLR.
I understand that it can seem a little bit overwhelming at first - you are used to the camera making all of these decisions for you, so it can be difficult to even know where to start!
Never fear though, as today, I'm going to walk you through the steps for choosing your settings in manual mode, and give you some example photos (along with the camera settings too) so you can see it all together.
How to Choose Your Settings In Manual Mode
In order to set your exposure in manual mode, you are going to need to choose a "number" for your Aperture, Shutter Speed and ISO, and then balance them to get the correct exposure. That's all very well, but where do you start?!
We go into the whole process in depth in Auto to Awesome, but my advice in general is to first decide the MOST important element of these three settings and set this first - this is most likely to be your aperture or your shutter speed.
So, let's start by looking at these both in turn. Ready? Let's go!
When is Aperture the most important setting?
Aperture controls depth of field in your photos, in other words, how much or how little of the scene you are trying to capture will be in focus. (You can learn more about Aperture here if you are still not sure about this)
If you are aiming for a portrait shot with your subject in sharp focus, and a nice, creamy blurred background, then Aperture is the most important setting.
Similarly, at the other end of the scale, if you are shooting a scene where you want every single thing in the frame to be in sharp focus, say a landscape shot, again you need to choose your aperture setting first.
I would say that most of the time you will probably want to choose your aperture first as it is probably the single biggest creative factor in most photos.
The hardest part is knowing which aperture works best for any given scene. Whilst I can’t give you any specific numbers, here are a couple of ideas....
For Portraits (or where you want some creative bokeh) - somewhere between F1.4 and F5.6 depending on how much you want to blur out the background, how close you are to your subject and what lens you are using and so on.
For Landscapes (or scenes when you want pretty much everything in focus) Between F11 and F22 is probably where you want to be. Again the exact number will depend on the actual scene and how far apart the various elements are.
Snap Shots or Group Shots - Keeping your aperture between F5.6 and F8 is enough to keep most things in focus. In most situations, this is where your camera is likely to put your aperture in Auto :)
Macro Photography - with a true macro lens you want to use quite a high setting as the DOF is so shallow. I recommend starting at around F14.
To get a better idea of which settings to use when, be sure to download my FREE manual mode cheat sheet!

Now onto some examples where aperture is the most important setting:
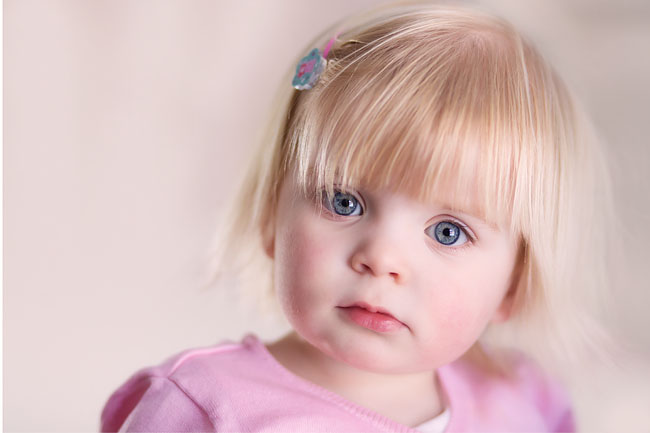
F2.2 / 1/250/ ISO200
In this photo, aperture is my most important setting, as I wanted a blurred back-ground. I chose to use F2.2 to make sure that there was sufficient background blur for the image, but enough area in focus so that the subject was totally sharp. My subject was relatively stationary, which is why I used 1/250, and my ISO was simply my “balancer.
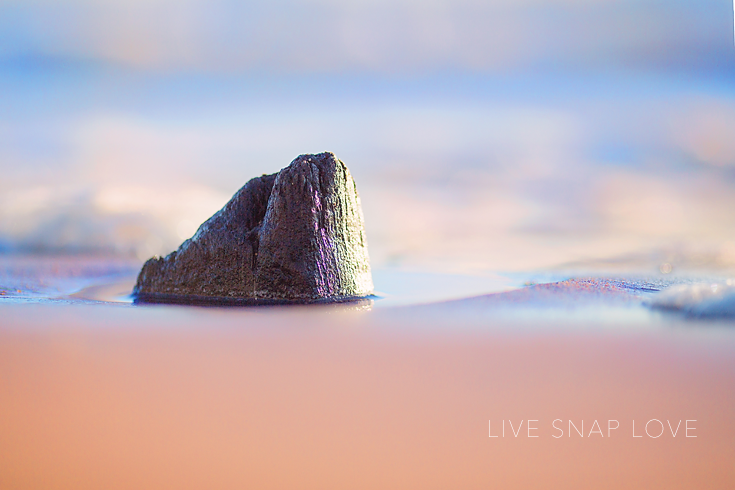
F2.0/ 1/8000 / ISO100
I wanted a very soft, buttery, dreamy back-ground here, so aperture is my most important setting and I’m using F2.0. This aperture, combined with how close I am to the subject, results in a very soft, blurred background.
There is a lot of light around the subject, so my shutter speed is high simply to balance out the light - I’m getting a lot in through that wide aperture, so I need a very fast shutter speed to reduce the light getting in.
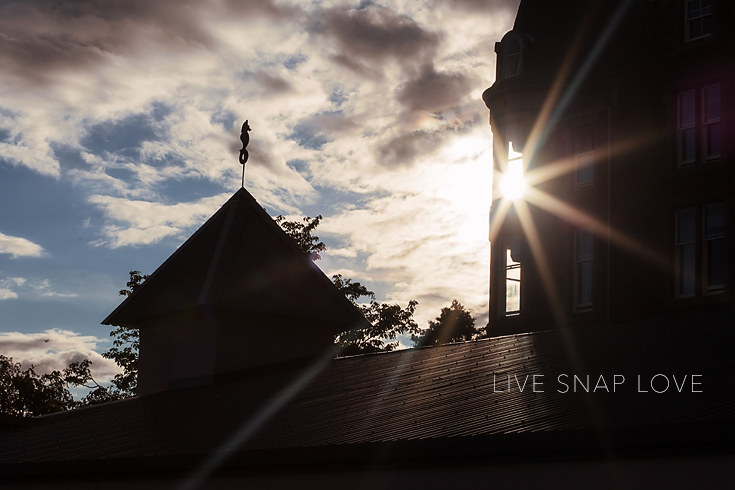
F22 / 1/640 / ISO 200
In this image, aperture was again the most important setting, since I wanted that star burst affect. I am shooting straight into the sun, and therefore there was quite a lot of light getting into my camera!
This is why my shutter speed is at 1/640 - not because I needed a high shutter speed to freeze motion, but simply to balance out exposure.
My settings here are not perfect - my ISO could / should have been down at 1/100 as there is no reason for it to be a 1/200 - however it really makes no difference provided the exposure is correct and it’s still low enough that no grain was introduced by this little slip up :)
When is Shutter Speed the Most Important Setting?
Shutter speed controls how fast or slow your camera shutter opens and closes, and will help you freeze or show movement.
So Shutter Speed your most important setting if you are trying to photograph fast movement or you are trying to show movement through motion blur.
If it is an action shot, for example of your child at sports day, you will be trying to “freeze” the action with a fast shutter speed, so this is the most important setting for you. I
f you are trying to show action by creating motion blur (think a dreamy, blurred waterfall) then again shutter speed needs to be set first, but this time with a slow shutter speed.
Again, let’s look at some examples:
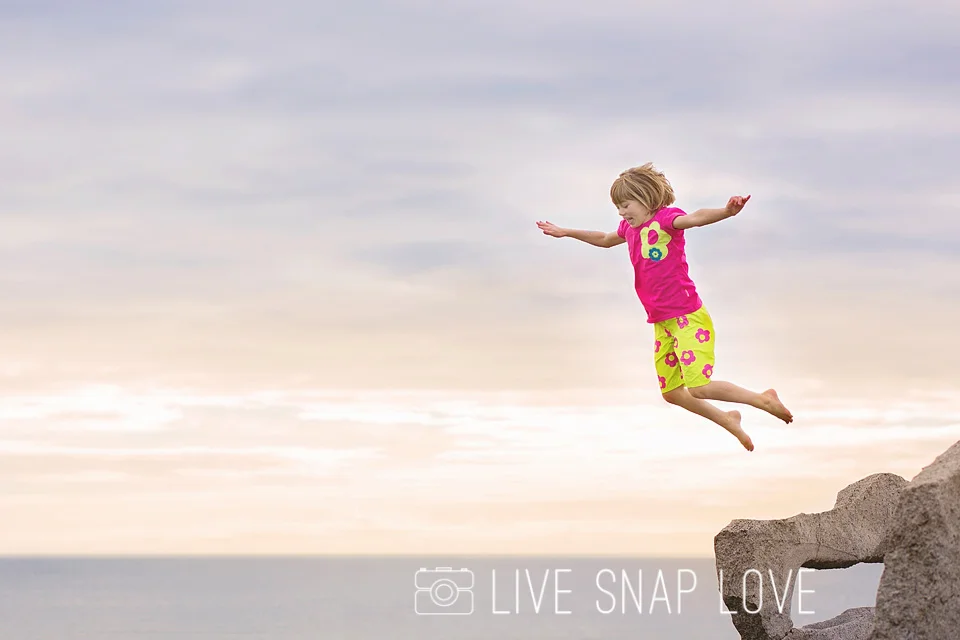
F4.5 / 1/800 / ISO200
Since my subject is moving, I need firstly to make sure that my shutter speed is high enough to capture the movement. I choose 1/800 to ensure a clean, crisp image. Next up was my aperture at F4.5 to give me some blur in the background but still sufficent depth of field, and I have my ISO at 200, which again was simply at that number to balance my exposure, and allow me to use the aperture and shutter speed settings that I wanted.

F32 / 1/13 / ISO 100
In this one I’m trying to show light motion (the photo is actually bubbles being blown - the lights are the sun reflecting off the bubbles) so I’ve used a pretty slow shutter speed, 1/13, to show the light streaks.
As I have slowed my shutter speed right down, I’m letting more light into the camera so I need to close up my aperture at F32! (this was outdoors on an incredibly sunny day)
This is actually a great example of choosing your most important setting first - I have no choice here with my aperture as my ISO is already at the lowest point, and I need that slow shutter speed to show the bubbles this way - my aperture is now the one to balance my exposure.
(Don’t forget to grab your free manual settings cheat sheet too!)
Is ISO ever the most important setting?
In some situations where you have extremely low light you might want to set your ISO first and see what you are left to play with in regard to your aperture and shutter speed.
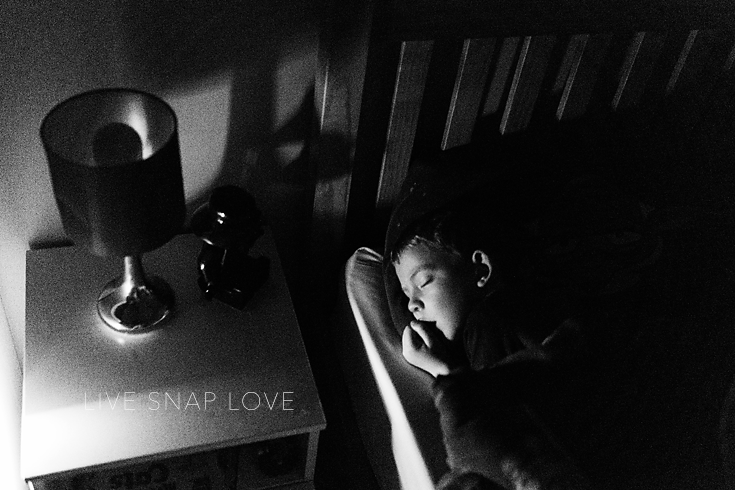
F1.4 / 1/30 / ISO25600
This image was taken with a very small light source (in this case just the light from an ipad) and as a result I knew immediately I would need a high ISO, so I set this first at ISO 25600 (the absolute maximum for my camera)
Even at this maximum ISO setting, my aperture is at F1.4 (the largest aperture the lens would allow) and taken at 1/30 - much, much slower than I would normally like.
You can see the affect that high ISO has had on the image - it’s not crisp or clear, and there is a lot of noise in the image - something that you need to just embrace from time to time, although there are some things you can do both in camera and processing to reduce the noise if you wish!
This is the only type of situation where I would consider ISO the important setting, and the one you might want to “plug in” first. Generally you want to- keep your ISO as low as possible without under-exposing, or having blur through too slow shutter speeds, or having unintentionally out of focus areas.
There are no perfect settings.....
I hope you can see from this that there is no such thing as “perfect” settings for any one type of shot - you are simply trying to balance your exposure the best you can, whilst trying to get the image the way you want it to look!
(And remember you can download the free manual mode cheat sheet for more ideas for your settings, and so you actually remember all of this!)
So, when you are taking a photo and need to choose your settings on manual mode, stop for a moment and think first of what you are trying to achieve, and decide which setting is the most important. You are working down in order of importance - for example, if Aperture is your most important setting, plug this into your camera first. Shutter Speed would then be the next most important, so plug that in next, and ISO is going to be the one that you set to get your camera to expose properly.
Of course, just getting your settings "right" is just one half of the battle - you need to know WHERE to expose to, not just about getting the three elements balanced.
That's something we go into a lot in my Auto to Awesome course, but starting to take control of the elements and what they can do to affect the look of your image is the first step forward!


