
11 Things All New Photographers Should Know
I’ve made more mistakes that I can count over my 11 years in photography, and I definitely took longer to get where I wanted to be because of them!
I’m going to hazard a guess that actually, you’re a lot like me back then - you want to get great photos, and you want them NOW.
Because of that, it can be tempting to try to take shortcuts, or hope that if you can just save up enough to get that new lens / camera, that will make all the difference, or keep on endlessly searching the internet for a hidden pearl of wisdom or “secret” from a photographer you admire, that will make it all come together for you.
Which is why I want to share with you 11 things that I think you should know right now, from the get go - things I wish that someone had told me (or at least, that I had listened to 😂)
And hey, if you’re NOT a new photographer, but still struggling to get the images you see in your head, this is still for you - because maybe one of these is the culprit that’s holding you back.
Wherever you are, I want to save your time, your energy, your bandwidth, and yes, even your money, so that you can get to where you want to be faster, and with less frustration.
So let’s dive in…

1.There’s a lot to learn!
You’ve probably come to realise this already - there is SO much to learn in photography if you want to take “good” photos with your DSLR or mirrorless camera!
That’s because you want to learn several things, almost simultaneously, like how to take control of the camera yourself by choosing your own exposure, your own focus modes and your own white balance settings. You also want to learn about light, and where best to place your subject in relation to it, and about composition, so you can get images that are interesting and engaging.
And that’s not even getting started on the editing side of things!
I know many new photographers get overwhelmed because of the sheer amount of information to absorb, but the good news is, you can totally make this manageable, by not trying to learn everything at once.
Which leads me neatly onto….
2. Take it one step at a time
It’s easy to get frustrated when learning photography, because you can feel like you are picking up so much information, but nothing’s coming together, and you STILL can’t get the image you see in your head!
It’s usually because you’re reading lots of “tip” and “tricks” which don’t go together, so you’re trying to do Step 10 when you haven’t fully learnt Step 2 😉
That’s exactly what happened to me, and SO many of my Auto to Awesome students, so if that’s where you are now, I know exactly how you feel, and you are definitely not unique!
My advice is to break it down into more manageable chunks by getting yourself a proper learning curriculum, just like you would if you wanted to learn anything else.
That way, you’re learning things in the order they need to be learnt, so that you’re not skipping ahead and missing all those bits of information that connect the dots and helps it all make sense.
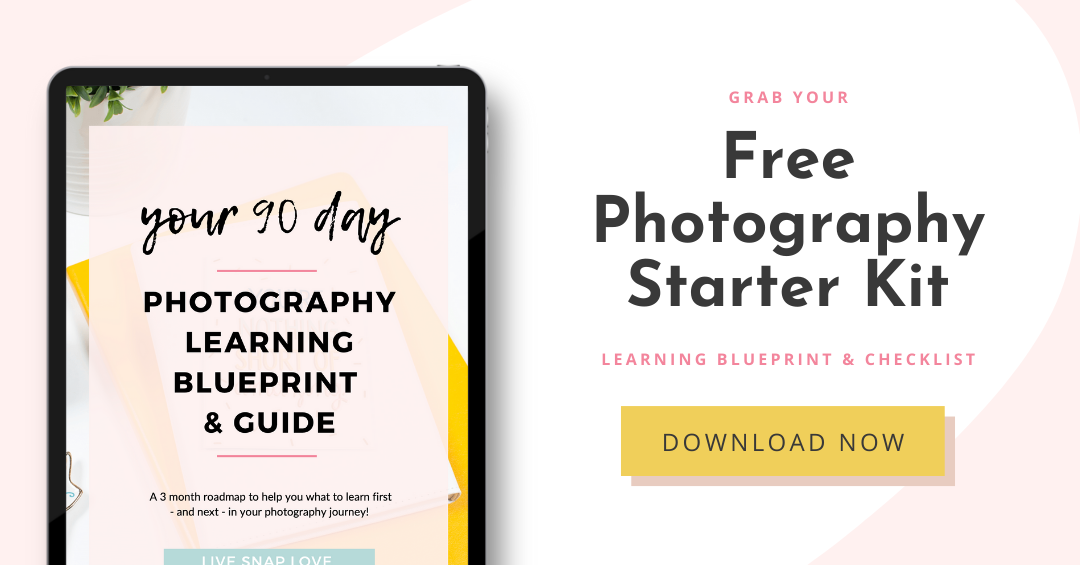
I have something for you that can help with this - my Photography Starter Guide & Checklist! It’s a learning curriculum for you so you can master your camera within a few weeks. And did I mention it’s FREE? I know, I’m too good to you 😉

3. Shooting in manual mode matters
When I was first starting out, I knew I had to move away from the AUTO mode if I wanted to get better photos, so I started shooting in Aperture Priority Mode, and stayed there for about 3 years.
I thought that as I was choosing my own aperture and ISO, and the camera only had to choose one setting for me, it was going to give me enough control to get the photos I wanted, and I couldn’t see the point it making that final step to manual mode.
It was at this point I really thought about giving it up, because although my photos were okay, there were definitely certain images I just couldn’t get, and worse, I didn’t know what I needed to do to get them.
Turns out, learning how to shoot in manual mode was critical.
I can’t say I wasn’t told this, because I was, over and over again, but I just didn’t understand what huge difference it would make until I actually made the switch.
This was a comment from one of my Auto to Awesome students that says it all:
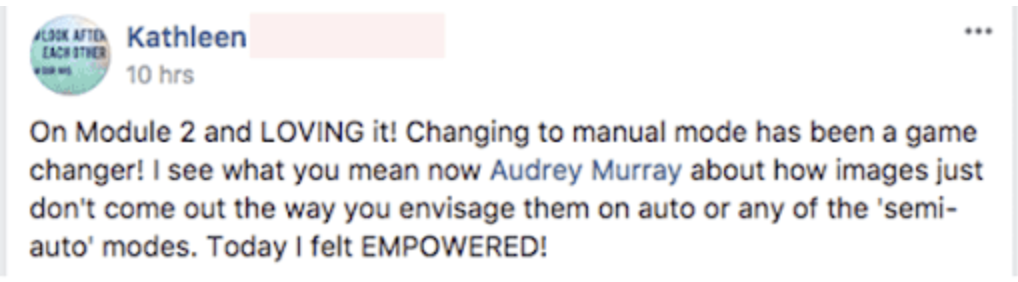
Learning how to use manual mode correctly was a turning point for me in photography, as it was when was able to get those images that I hadn’t been able to previously.
So if you want to save yourself from 3 years of frustration, move from Auto to Aperture Priority Mode, and then take that final step by switching to manual mode.
You’ll be so glad you did!
(I do actually have yet ANOTHER freebie for you - a manual settings cheat sheet. How good am I?!)

4. Light is THE key component of any image
Another thing I wish I had paid more attention to was the LIGHT, but the truth is, until you have mastered manual mode, it’s hard to master light.
That’s why in my Auto to Awesome program you learn how to shoot in manual mode FIRST, then we immediately move onto how to use light, because the two are intrinsically linked.
Truly learning about light does take some time, but you can definitely make a good start in just a week or so, by learning some key strategies of how to use available light in different situations.
You’ll continue to learn and experiment with light throughout your photography journey, so this is never a one and done scenario, but just getting some basics down will move your images from meh to wow in seconds!
5. Don’t fear using a high ISO
This is another one I hear ALL the time - you don’t want to push your ISO number too high because you’ve heard that in order to get less noise in your images, you need to use a low ISO.
Now that IS true - high ISO’s can lead to more noise in an image, but it’s even more important to remember 2 things:
1) When you keep your ISO low and it results in an underexposed image, you will actually have MORE noise than if you’d kept the ISO high and exposed correctly.
2) When you keep your ISO low and you end up lowering your shutter speed to counteract it, you’ll get “soft” images due to motion blur. You can’t fix motion blur in editing but you CAN fix noise, so it’s far better to have a noisy image than a soft one.
Moral of the story: use the ISO number you need to get the correct exposure, and have your other settings where you want them, and don’t worry about using a higher number than you would like!
6. Don’t worry about editing for now
Although I did just mention editing (I did, didn’t i?!) don’t worry too much about editing when you are still learning your camera and about light.
I spent an INSANE amount of time editing my photos in the beginning, which basically involved me trying to make a silk purse out of a sow’s ear.
I’d spend hours trying to fix all the problems that shouldn’t have been there if I’d just learnt my camera properly, and realised that an image with bad light and composition can’t be magically made better by a little editing.
Focus first on learning the basics - what we spoke about back in number one of this list - and then, when you are getting beautiful exposed, tack sharp images that use light and composition beautifully in camera, you can then go and learn how to edit to take them to the next level. But get that baseline great in-camera first.
Ideally, you will want to learn how to take the steering wheel and drive your editing program yourself, rather than relying on presets or actions, because that’s the BEST way of bringing your photo to life, but that’s another rant for another day :)
7. You don’t need expensive gear
Photographers love a bit of lens or equipment talk, so it’s easy to get caught up in the feeling of “If only I had that lens, or a better camera body, then my images would look more like theirs”
I know it’s tempting to hope for quick fix - we lead such busy lives that we have to take shortcuts where we can - but a better camera or lens will not automatically fix your image problems.
Doing what I mentioned already - learning your camera, shooting in manual mode, and learning about light - is what is needed to make your images look better.
That’s not to say that upgraded gear is worthless (of course not!) but it can only give you back what you put in - a $3,000 camera on AUTO will give you roughly the same results as a $600 camera on AUTO. If you’re not getting tack sharp images with your entry level gear, a new camera will not make them any sharper. If you’re using sh*tty light, using a top of the line pro camera will not make it any better.
If you are still feeling skeptical (I can feel you it radiating off you!) then I want you to check out a couple of case studies that we’ve done here on the blog. Both of these used entry level cameras and basic lenses, so if they can do it, so can you.
Check out Erica’s Photography Journey here.
Check out Katie’s Photography Journey here.
Forget about gear until you have those basics down, then upgrade later when you’ll actually get the benefit of it!

8. There’s more to sharp photos than just “tips”
Another source of frustration for new photographers is FOCUS - or rather a lack of it!
It’s SO annoying isn’t it?! You look at the image on the back of the camera and it looks sharp….but then you zoom in on the computer and you realise that the image is ever so slightly annoyingly SOFT. Again.
I was once that person frantically asking random people in Facebook groups WHY ARE MY PHOTOS SOFT but although I would get some super lovely people giving me helpful tips and tricks, it never really solved the problem.
That’s because everything in photography is connected, so it’s only when you get all the pieces of the puzzle working together that you’ll be able to increase that hit rate of keepers, even with large groups or crazed, erratic toddlers.
Tips and tricks is like putting a band-aid on a gunshot wound - instead, learn the fundamentals, and your focus problems will go away!
(Want to know what they are? Get the guide below 👇)
9. You’ll get worse before you get better
It has to be said that if you take my advice and move away from the safety of having the camera make all the decisions for you, and instead, take control yourself, there will be a period when you feel like you’re getting worse. Because you are.
I want you to know this is 100% normal.
A good analogy is to think of it like learning to walk.
You don’t just move from crawling to walking instantly, you take a few tentative steps…..and then fall over. Before falling over again. And then bashing your head off the coffee table and wailing.
And even when you do kinda get the hang of being on two legs, it’s actually taking you longer to get to where you want to be than if you had just crawled there.
But you (or at least your parents) were smart enough to realise that you had to go through that in order to grow. Failing is just part and parcel of learning something new.
But once you’ve learnt how to walk, you’ll never ever revert back to crawling again. (well, perhaps occasionally on a Saturday night after too many margaritas)
All that to say, just push through it, accept the fact you need to get worse before you can get better, and you’ll reap the rewards.

10. Not every images needs to be wall-worthy
Not every single photo you take needs to be a masterpiece. You can create photos that are just for you, and are more about capturing a memory than winning any awards.
You can also take photos that you intended to come better than they were, but just turned out to be something bland and forgettable. Who cares?
When you look at photographers on Instagram or in their portfolios, you are only seeing their “best” or at least their “better than average”
But you aren’t seeing the 100’s of photos on their hard drive that were just OK, or didn’t nail the spot.
Everyone takes average photos - and some may downright suck - so never think that just because you aren’t cranking out amazing photo after amazing photo you’re doing something wrong - that’s just what it means to do anything creative.
11. Don’t get distracted
We live in a world where there has never been so much easy access to information, from places like blogs, Facebook groups, podcasts, forums, Instagram and Pinterest….yet all that happens is we feel overwhelmed and bombarded from every corner.
The best advice I can leave you with is this: try your very, very best to only focus on the next step in our journey, and block out everything else that doesn’t help you reach that next step.
I can tell you this: if you keep getting waylaid by different things you find in blog posts or in Facebook groups, then it will take you 10 times as long to learn photography, and make the journey 10 times harder.
All that zipping around may feel like you’re getting somewhere, but don’t confuse activity with accomplishment.
The shortcut to great photographs is not is a set of hidden tricks, or getting a quick tip from a pro that is going to make everything look amazing: It is about about learning the steps in a logical and linked path.
It’s about taking the time to truly learn your craft - and the surprising thing is, when you commit to THAT, instead of endlessly searching for something that will help you get there faster or cheaper, you’ll find that your photography path actually shrinks, and you’ll get there before you know it.
Pinky promise.
If you would me to take you by the hand and teach you everything you need to know, in the order you need to learn it, then be sure to get yourself into Auto to Awesome when the doors open.
That way I’ll be with you every step of the way to help you get your images out of your head and into the world where they belong. (And I’ll be there to pick you up when you fall along the way, and think about going back to crawling)
Doors open soon so go here to learn more!
If you want a little sneak peek at what you need to learn (and in the order you need to learn it) then be sure to pick up that free guide I mentioned - I’ve laid it all out for you in case you’re a sado masochist and you want to go it alone 😂
As always, thank you so so so much for being here. Know that I appreciate you taking the time to read my posts, leave comments, or when you come say hi on social and talk to me there.
If you enjoyed this post, you can thank me by sharing it far and wide! Post it on social, pin it to your pinterest boards, or just tell a friend about Live Snap Love. 😘
DIVE DEEPER:
What to focus on when first starting out in photography
My Top 8 Photography Mistakes (and how to avoid them)
PIN FOR LATER 👇
