Shaped Bokeh : Create Your Own Bokeh Filter!
Learn how to create shaped bokeh in this step by step tutorial, where you'll learn how create your own bokeh filter with just some black paper, scissors and sellotape!
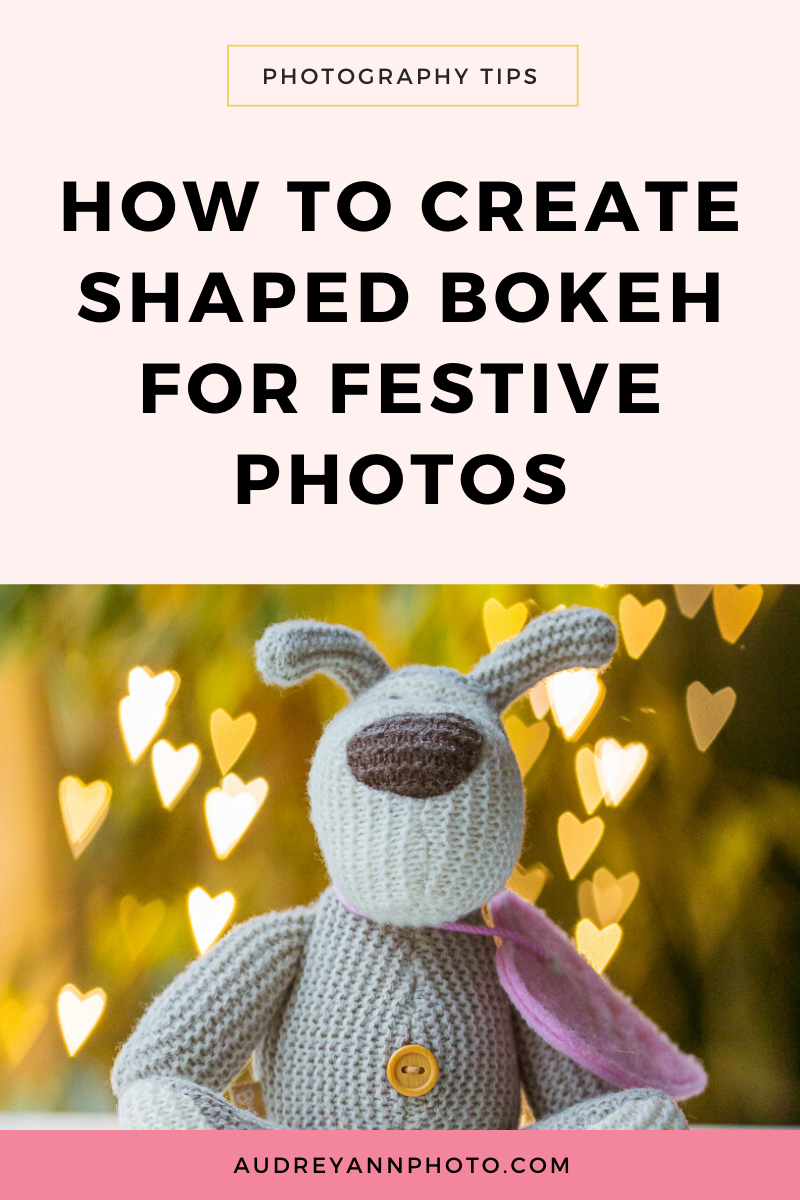
Shaped bokeh is where you change the circles of light you would normally see background to shapes, such as heart shaped bokeh, or star shapes bokeh or even festive Christmas tree bokeh! Basically you can create any shape that your little heart desires, and all you need for this is to make your own DIY bokeh filter.
Now I don't have time for a long drawn out craft project, so if you don't either, don't worry, we can create this shaped bokeh filter this in less than five minutes! You also don’t need a lot of tools to complete this, so it’s super simple - just watch the video below to see how quickly you can make it!
(Do watch until the end though as I have some extra tips for your for getting good shaped bokeh too!) Watch the video below or scroll down if you prefer to read!
Links & Resources Mentioned In Video: !
How to get a blurred background video (use these tips for the shaped bokeh too!):

This is one of those where you would be better to watch the video, but if you prefer to read, I’ve listed out the steps for you below!
What you’ll need to create a shaped bokeh filter:
You're only going to need three things to create this DIY photo filter. You’ll need some black paper, a pair of scissors so you can cut out some shapes, and you're going to need a roll of sticky tape so you can stick the whole thing together.
Now I do want to say right now, before we start, none of this needs to be perfect! If you watch the video you’ll see just how ropey mine looks, but it still does the job perfectly :)
Step One:
The first step is just simply to take your black paper and cut off a strip of paper from the side. So we want that to be around two and a half inches thick. And what we're going to do with this as essentially just wrap this around our lens to create a kind of sheath that fits around your lens.
You're literally going to take that piece of paper, wrap it round your lens like that, and then you're just going to hold it back in place with a piece of sticky tape so that we've created a kind of sheath for our lens.
And you should end up with something simple like below where you can just slip that on over the top of your lens and take that back off so you can use that filter on different lenses as well.

Step Two:
Next, take a sheet of black paper and what I want you to do is simply trace around your lens. So you're going to lay the lens down flat on the paper, and you're just going to trace a circle just around the diameter of your lens. And then I want you to create another circle around that, which is just about two inches, two and a half inches around that. Then just cut around this outer circle. You should end up with something like this: (Watch the video if you need more guidance!)

Step Three:
Now cut in from the outer circle to the inner circle, just creating slits all the way around. That is going to create kind of flaps that you are going to be able to bend over the sheath that we created back in step one.

Step Four:
So the next thing that you need to do is take this a circle with flaps that you've created, and in the middle of that circle that you traced around your lens, you are going to cut in the shape that you want your bokeh to be. So if you want heart-shaped bokeh, you're going to put a heart, for start shaped bokeh, you're going to use a star.
Now I just do this using a pair of scissors but if you want something a little bit more complicated, then you might want to use something like an Exacto knife.
Now I do want you to make this reasonably large. Remember the light does need to come in through your camera, so about one and a half inches.
Step Five:
The final step is simply to attach that circle that you've just made with the shape and you're going to attach that to the sheath you made back in Step 1.
(If you need any help, do watch the video - it’s much better to see this one on video!)
And that is your DIY bokeh filter for creating shaped bokeh - now go get creative with your lights!