
How to Take Studio Portraits At Home

Ever wondered how you can take beautiful studio portraits at home? Then you’re in the perfect place! I’m going to share with you how I take studio portraits at home using nothing more than natural light, and some simple inexpensive backdrops.
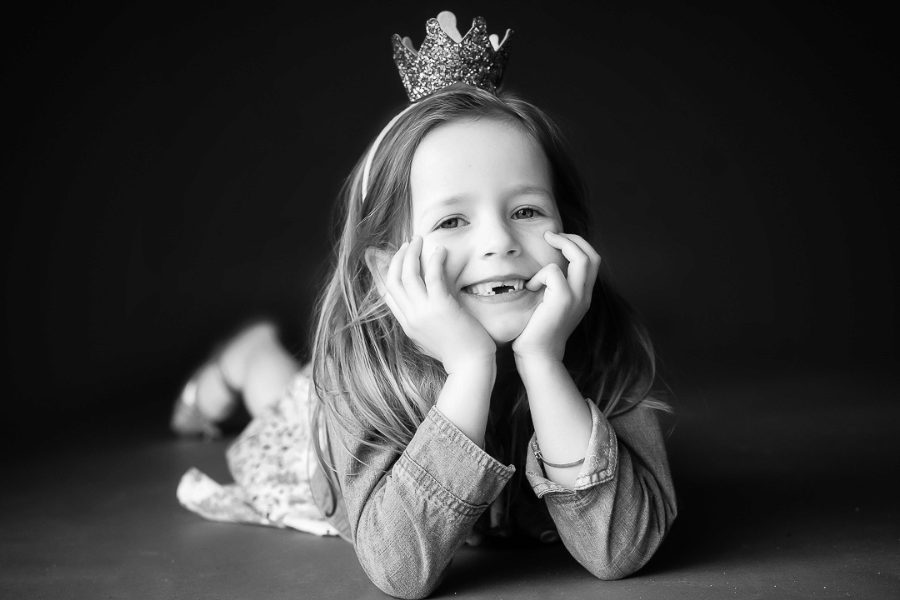
Because as much as I love natural, candid documentary and lifestyle photos, my other love is portrait photography. Although I love portraits outdoors, there’s something really powerful about a simple studio portrait - it allows the focus to be completely on the person, plus you can get really inventive with backdrops and props, so you can really let your creative side have fun without worrying about the weather or locations!
Of course, we don’t all have the luxury of having a studio space, or studio lighting, but that doesn’t mean you can’t take beautiful studio portraits at home, in a lot of cases, using what you have, or at least relatively inexpensively.
I bought everything I need for the studio style photos I take for around $200, which I think is pretty good, and works for me! Obviously, you can go much higher end than this, especially if you plan to set one up that you can use continuously, so the price can go from completely free to thousands of dollars. (Don’t worry, we won’t be going into that in this guide though!)
Instead, I’m going to walk you through how to take studio portraits at home, using what you have, or cheap and cheerful equipment.
So let’s go ahead and dive in!

Step 1: Consider your light source
The first thing we need to decide on for our studio portraits is the light source we are going to use.
Light has to be first thing we look at because it’s the most important element of any portrait, whether inside or out! It doesn’t matter how gorgeous your subject is, what beautiful backdrop you use, or what lens you have on your camera - if the light isn’t good, then you’ll have bad photos.
And remember, bad light is one of the things you really can’t fix in editing, so it’s really important to get this right when deciding where to set up your at-home natural light studio!
The light we will all have available is natural light, so for your simple home studio, you need to find a room or area that has a lot of natural light available.
Your first option is to choose a room that has a large window - any large window will do, but a patio door where you have floor to ceiling light is ideal, and that’s my preference when shooting indoors.
But your natural light at home studio doesn’t have to be in a room in your house - I often set mine up in the garage!
It has beautiful natural light because of the large doorway, plenty of space (or at least it does after I turf my husband’s motorbikes out) and I can hide the clutter with my backdrop. So for me, I either use my living room or the garage, depending on how I’m feeling that day.
Another option is to use a doorway with natural light, for example, your front door - simply open up the door and use that as your light source!
I am not going to talk about dedicated studio lighting in this guide, because that’s a whole different ball game, but if you do feel you might need a little bit more light, you also have the option of supplementing the natural light with a speedlight - I don’t often use this but it’s nice to have as backup.
(Not sure how to use a speedlight? Check out our Speedlight 101: On Camera Flash KickStarter Guide!)
One more thing you might want when it comes to lighting is a large reflector - the size of this will depend on the subject, but you want this as large as or ideally larger than your subject.

Step 2: Consider the SIZE of the location
The beauty of having a simple set up for studio portraits at home is that you can mix up where to set everything up!
So in addition to your light source (a.k.a finding a space for good light) there are few things to consider when it comes to choosing your location.
The first is, we generally don’t want to have the light hitting our subject from the front, so aim to have the light source at a 45 to 90 degree angle from where you are going to place your subject. This will give you a nice soft flattering light.
The second thing is you are also going to want to have enough room to leave some space between the subject and the backdrop, and from you to the subject.
So in addition to considering the light source in the room, make sure you have enough room to set everything up.
I find when shooting indoors that I stick to head and half body shots rather than full body shots (unless they’re only little!) but our rooms aren’t particularly large!
So when choosing your location, think both in terms of light, and of space.

Step 3: Choose a backdrop or find a blank wall
If shooting in a room indoors, all you need is a blank wall! Take any paintings or framed pictures off the wall, and remove anything from the shelves like plant pots or ornaments. We want to keep the area behind your subject clutter free. (Ever seen a studio portrait with last night’s dinner in the background or a picture of your Aunt Ida? Nope, neither have we)
However, it might be difficult to find a blank wall right behind where you should place your subject, which is also in a good place in relation to your light source. (Getting the two together is lucky!)
This is where you can use a portable back-drop, which will create that blank wall behind your subject wherever you want it! 🙌
You have several options here, again all the way from the free to the expensive.
Let’s start at the zero cost options.
First of all, you can use a bedsheet - not a fitted sheet which has those elastic bands at the corners but a flat bedsheet. These can be plain or patterned, and any different colour.
They do tend to be a little thin, so maybe doubling these up for your backdrop is a good idea, but see what your sheets are like. On the plus side, these are really inexpensive and probably something that you already have several options with! You can also use things like quilt covers, or blankets in addition to bed sheets.
(One little tip: if you are using a bed sheet, make sure that you iron it to get rid of any creases, and that it’s big enough for your intended purpose!)
Moving onto paid options, you can get rolls of vinyl in all types of patterns from marble to wood grain effect, or a brick wall, floral patterns, and so on, and you can get plain ones too. You also get muslin ones fairly cheaply.
A slightly more expensive option, and the one I use, is a seamless paper backdrop.
These are just very wide rolls of super sturdy paper, and they come in a wide variety of colours, and you can get plain or patterned. I personally prefer a plain backdrop - you can always add a pattern or texture in Photoshop to mix things up and change out the look each time. These can vary in price -this one from Kate is just $35 to the higher end Savage Seamless Paper rolls.
I also would recommend getting one in a neutral colour as that can be used for a wide variety of images - I particularly like my Savage Thunder Grey one, but whatever works for you!
As for the size, I would recommend the 107″ rolls. The 53″ rolls are okay if you are working with a newborn or single subject … or a very close pair of subjects that don’t mind squishing together and staying still. I just like the freedom of the 107″ width so if you have the room, go for it, if you don’t, the 53” is fine.
Step 4: Use something to hold up the backdrop!
The next thing you’ll need is something to hold up the backdrop.
Again, these range from the super cheap to uber expensive!
The first cheap and cheerful option is to simply take your backdrop and pin it up on your wall if that’s an option and you simply wanted to hide the wallpaper or change the colour out.
Another option is to take 2 dining room chairs, and drape the fabric over them. (You can put a pole of some description, like a sweeping brush between them if you need a bit more width that the chairs give you!) This won’t work for portraits of full sized people (great for newborns or food photography though!)
The next is to do what I did, and buy a super cheap set of backdrop stands. These come with 2 stands and a pole connecting the two that you thread through the roll of backdrop paper, or clip your fabric onto.
These are so portable, so you simply fold them up and pack them into a bag when not in use!
The downsides to these being so portable (and let’s face it, cheap) is that they are super flimsy, and you’ll need to weigh down the base of the stand with something. Or, again, if you’re really serious about this, you can invest in a more sturdy set of backdrop stands. You can get ones that hold multiple rolls, so these are great for quickly changing out the backdrop. (you can see an example here)
If you want to go down the DIY route for your backdrop stands, I’ve seen these made out of PVC pipe, so if you got the time and inclination, that’s an option too.
The final thing you need here is a set of pony clamps - you clamp these onto the top of the paper roll to stop it sliding down. These are usually included in your stand kit though.

Step 5: Flooring
If you are going for headshots and half body shots only, you don’t need to worry about this - you can glide over this and go straight to Step 5.
But for pictures where you want the full body, you’ll see the floor, so you need to think about that too.
Of course, if your floors are nice enough, you can just use that! Job done ✅
If not, the next option is simply to pull out the backdrop even more so you have a seamless wall to floor look. (That’s generally what I do because I’m lazy)
Again, if you’re taking this more seriously, you can create a fake wooden floor.
Go to your local hardware store, and get some laminate flooring, such as faux wood. You might also want to get a large piece of plywood and laid the click together faux wood flooring on top of the plywood for stability.
I would also recommend buying some white baseboard / skirting boards, and then roll the paper down to meet the baseboard, clamping it on both sides with the pony clamps. That will give you a fake wall trim between your backdrop and the fake flooring.
Step 6: Props
Finally, to make things a little more interesting, or just to mix it up a little, you can bring in some props.
These are totally optional, depending on what you are shooting, and of course how simple or dramatic you want to be! At the simple end you could add a flower garland for your subject to wear, or a simple old weathered chair or apple crate for your subject to sit on to add some texture, or just bring in a soft fluffy rug.
At the more stylised end, you could add in fluffy white clouds, a moon, or Valentine’s Day heart balloons, or a Christmas tree..…you get the idea!

Step 7: Start Shooting!
OK, so we have our location, we have our light, we have our backdrop, and flooring, and maybe some props.
Yippee! We’re ready to start shooting!
Some tips for you:
Make sure that you pull your subject away from the background, ideally around 6 to 8 feet; this is so you don’t get shadows on the backdrop. This makes shooting in the average room in a house very, very tight. For me, I end up shooting with my subjects closer than they should be to the background and having to watch carefully for any undesirable shadows.
With it being a little tighter, you might also (probably) end up shooting with a wider angle lens than you would normally. I big puffy heart my 135mm for portraits outdoors, but there’s not a chance of using this indoors, so I usually have on my 50mm for any studio style portraits. Sometimes the 35mm and 85mm make an appearance too, depending on whether I’m going for a headshot or a more full body.
So there you have it - how to take studio portraits at home!
I hope you’ve enjoyed hanging out with me again today, and maybe you feel inspired to create your own makeshift studio at home!
