
The Ultimate Guide to Lightroom Presets (+ Free Presets!)
Editing an image is an important part of the photography process, but if you are anything like me, you really don't have a lot of time to spend at your computer playing with your photos. Although using Lightroom is relatively quick and easy, there is a way you can save even MORE time by using helpers such as presets.
A preset is simply an edit that has been "recorded" so that you can apply the same steps to any image you wish, with just one click of your mouse. This can save you a lot of time processing your images, as all you need to do is click on the preset and leave Lightroom to to do rest of the work moving all the sliders for you. Kinda like having an editing servant 😄

Sound good? It is! That's why I'm going to go over everything you need to know about presets so you can put these to work for you and try to claw a little bit of time back into your life.
This post will show you how to:
Use a Lightroom Preset
Tweak a Lightroom Preset to get it to look the way you want it to
Create your own time saving Lightroom Presets
Install purchased for free Lightroom Presets (including the three free ones you are getting from me!)
Let’s dive in!
How to Use A Lightroom Preset
Using a Lightroom preset couldn't be easier, and you would probably be able to figure this out yourself, but hey, this is the Ultimate Guide to Presets so I'm not leaving anything out 😄
Head into the Develop Module, and go the panel on the right hand side, called the Navigator Panel. Here you will see a section for Presets.

Lightroom comes with some presets already built in, so you have something to play with to help get you started. Click on the triangle on the left of the presets panel to open it up if it's not already open. Once you have done that you'll see some Preset Folders, and again, just click on the little triangle on the left to open up any particular folder. Inside you will see the individual presets within that folder.
Make sure you have the image you want to edit selected so that it is showing in the panel in the middle, and then click on any one of the presets that takes your fancy. In this example, I've chosen B&W Look 1 under Lightroom B&W Presets Folder.

When you click on it, Lightroom will immediately make the necessary editing changes that are needed to apply this "look". In this case, this preset gave me an instant black and white conversion which took around, ooh, let me see, three seconds.
That, my friends, is the beauty of Lightroom Presets in action! In just a couple of seconds I've managed to edit an image, rather than a few minutes.
You can go down all the presets to see which look you prefer. You don't even have to click to apply the preset to see the effect unless you want to, since you can see a preview of how this will look on the small version of your image at the top of the Navigator Panel.
That's all you need to do to use a preset! Told you it was simple 😄
Pro Tip: Always try to use presets on images that have the white balance and the exposure correct. MOST one-click presets will leave these alone because they are unique to every image (some don't though) Generally speaking, presets will usually work better when you have these correct.
You can also get your hands on three Lightroom presets from me, fo' free, in my Lightroom Starter Kit. In addition to the presets, you'll also get a step by step guide to importing your photos into Lightroom, an editing checklist (so you know what to do and when to do it) and a export cheat sheet. Go here to grab the starter kit!
You'll also get to see these presets in action at the end of this post, along with instructions on how to install them - grab them now before you forget!

How to Tweak a Lightroom Preset
Although sometimes your image will look good right off the bat after applying a preset, other times, you will look at it and think it has made your image look worse than before!
The first thing to note is not all presets will suit all images - that's just the way it goes. Have a flick through other presets to see whether something else works better for that particular image.
However, the preset might work perfectly well if you just made a couple of small tweaks. So, if you think, "that's good but I wish..." then chances are you can tweak it to your liking.
I'm not going to lie, at this point, knowing how to edit within Lightroom becomes a real advantage because you have a much better idea of what changes the preset has made and how you can alter it, or even just to know just what it is lacking and therefore what you need to add.
In this case, I like the black and white but i wish it had a little bit more contrast, so I can just swoop in over to the Basic Panel on the right and add in some contrast, and deepen the blacks. . Although it takes a little bit of time to tweak a preset, it's still usually a lot quicker than doing the whole edit manually - in the majority of cases, I find that I can adjust the preset enough just by changing the sliders in the basic panel.

If you are not sure, play! Go down all the panels on the right hand side and see what adjustments the preset has made, and change them. It's a great way to learn what your preset has done AND learn how to edit your images at the same time.
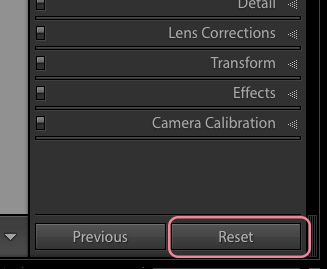
Tip: If you really don't like what has happened to your image and just want to go back to your original, unedited image without the preset applied you can! Just go to the bottom of the editing panels and you will see a button called Reset. Click that, and your image will go right back to the very beginning, as it was straight out of camera, no harm done.
How to Create Your Own Lightroom Presets
If you have a set of editing steps that you go through time and time again, then consider making a preset for them. Even if you just really like the way a particular edit has turned out, you can make a preset for that too, so that you can apply it other images easily and see if you like the effect on them too!
Here's what to do:
First of all grab an unedited, straight out of camera image, and play around with the sliders in the Develop Module until you get a look you want. Alternatively, just add in some basic adjustments that you do to most images, for example, adding contrast and vibrance. You can make adjustments to ALL the panels, such as the Basic Panel, Tone Curve, Detail and Lens Corrections Panels, and the preset will save them all if that is what you want - you can choose which settings to save in the next step.
Once you have the sliders the way you want them, head over to the panel on the left hand side (the Navigator Panel) and find the Presets section again. Just click on the + button you see at the right hand side.

A dialogue box called "New Develop Preset" will pop up. This shows all the different setting options that could be saved as part of that preset. You can choose to not save some of the settings in your preset, just by unchecking the box next to them. For example you may wish to uncheck white balance and exposure so that these are not saved as part of the preset. (That's what I have done in the example below)

Type in a name for your preset so you know what it is - be descriptive so you can find it again and know what it does. You can also select which folder in your presets to save this to - unless you want to save them somewhere else simply choose User Presets. Click Create when you're ready.
Congratulations, you have just made your first user preset!!
You can then find it your it in the Navigator Panel, in Presets, in the User Presets Folder. You can now use this just like any other preset.
How To Easily Install Presets
Although you can create your own presets, and use the ones that Lightroom provides, from time to time you might want to purchase presets or use free ones that you find on the internet. ( For example, I'm giving you 3 "one click" Lightroom presets along with my Lightroom Starter Kit!)
Watch the video below to learn how to install Lightroom presets:
How to take action:
Why not spend a little time practising with presets? Download my three "go-to" presets to test out how to install them, and how they work on your image. These are great for beginners in particular since they have been designed to be super easy to tweak because they leave the basic panel alone. This way you can just use those sliders to easily adjust them, even if you don't really know what you are doing yet.
Here's the three presets you can download and what they look like on the first SOOC (straight out of camera) image.


I hope you found this tutorial on Lightroom Presets helpful, and you can see how these can save you time editing. Oh, and enjoy the free presets!