10 Basic Photography Tips Every New Photographer Should Know
Today, I’m sharing with you 10 basic photography tips that every new photographer should know!
If you are a new photographer, maybe feeling a little overwhelmed with everything you need to learn, then this video is going to be perfect for you, as in it, I’m going to share some very simple tips that will help you lift your photos up, and give you some ideas about what to learn next (and what you should be aiming for overall)
If you prefer to watch and listen, you can see the complete video of this post below, but if you want to read rather than listen to my dulcet Scottish tones (what, really?!) then scroll down to read….
(it’s a good ‘un either way!)
Plus, if you’re a new photographer, I’m got a freebie for you that you’re going to go bananas over: my free 90 Day Photography Learning Blueprint, which has everything you need to learn mapped out for you. (Trust me, you’ll love it - and it’s free!) Go here to grab your copy.
Got that? Great, let’s dive in….
#1 Keep your background simple and clutter free
Now, obviously you can choose wherever it background you want, but try to make sure that there's nothing in the background that is distracting from your subject. You don't want something that is pulling the eye away, so try not to have distracting backgrounds, or things growing out of your subjects heads, and make sure there aren’t any objects in the background that may be pulling the viewer’s eye.

#2 - Use natural light whenever possible
Whenever possible, you are going to get SO much better results if you use natural light only.
So that means using the windows in your home, or going outside and getting all the beautiful, natural light that is there.
You do want to avoid unnatural light sources, such as household lamps or overhead lighting, at least when you're starting out, but you can definitely use those as light sources later!
I actually recommend that you start indoors as it’s easier to control the light there, and then branch hope to shooting outdoors, and then you can add in artificial light at a later point in your journey.

#3 Dig out your camera manual
Now your camera manual is pretty useless for learning photography, so wouldn't even attempt it! But what it is good for is knowing where everything is on your camera. So many people (like my good self) will give you instructions on how to shoot an aperture priority mode or manual mode, or how to change your focus point. but they're unlikely to be able to do that for the particular camera that you have.
And that is where your camera manual is worth its weight in gold!
So when someone like me to ask you to choose your own focus point, you want to know how you can do that on your own camera. So dig out your camera manual, find out where and how you change your aperture, your shutter speed, your ISO, how you set your own white balance and how to change your focus point, just for starters.
#4 Get in close
So one of the things that we see a lot from new photographers as they just kind of point the camera in the general direction of the subject, and then leave all this space around them. Now you can absolutely do that when it suits the photo, but always ask yourself if what is in your frame is actually adding to the image: if not, consider getting in closer and have your subject take up more of the frame.

#5 Learn to blur out the background
In portrait photography, the trick of blurring out the background is used a LOT.
This is when you have your subject in sharp focus and then everything behind them is soft and blurred. What this does is helps blur out any distracting elements in the background, and it pulls focus directly to our subject.
This is firstly because they're the only thing that's sharp in the frame, so our eyes are immediately drawn to that sharpness.
Secondly, it blurs out anything that might be distracting, again, helping bring focus to our subject.
Obviously you're not going to use this in every shot - for example, you wouldn't use this in a landscape photo- but blurring out the background is a great way of bringing attention to your subject!

#6 -Don’t always place the subject in the center of the frame
Now there is times when having your subject in the center works, absolutely, because we get symmetry that way, which is wonderful, but it also leads to a more static image.
If we want a more dynamic image, we can do that by moving our subject away from the center of the frame.
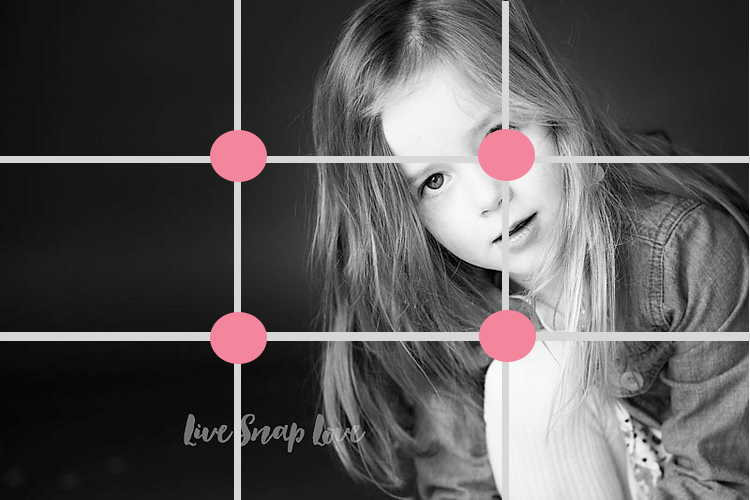
Now there are a number of compositional rules or guides that can help you decide where to place your subject in the frame, but the easiest one for starting out with is called the rule of thirds.
Simply imagine your frame divided into nine equal sections, like you can see in this example below. Place your subject along one of those lines, or at the points where they intersect. This will help you get a more dynamic and interesting photo.
#7 - Don’t be afraid to take photos!
If you have a digital camera, then it doesn't cost you anything to take any photos! You're not going to have to go and pay for getting your photos printed, so you can simply upload them onto the computer and you can just get rid of the ones that you don't like without costing you a penny.
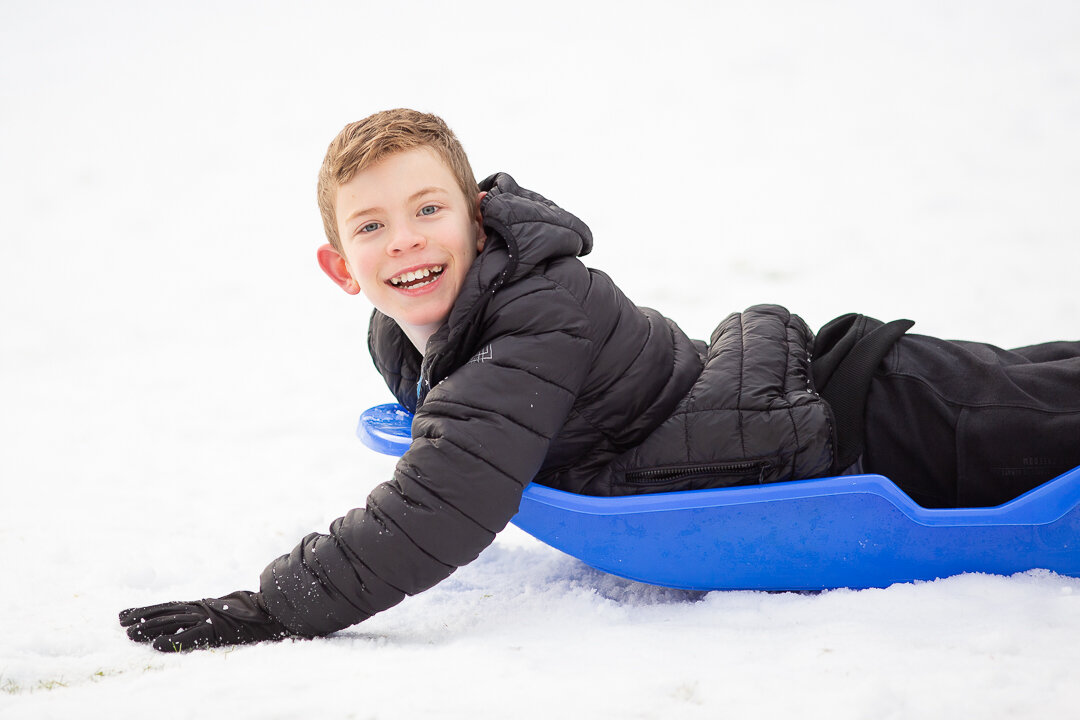
Take advantage of this, by experimenting with different angles.
What we tend to do a lot, especially when we're starting out, is we stand up and we snap a picture from our viewpoint as we would normally.
So I would encourage you to move around your subject - for example, lie down in the ground on your belly, what do you get from that angle? Of get above your subject and shoot down on them. What does it look like from there?
You'll usually find that as you move your angle around from what would be the “normal” viewpoint, in other words from where everyone else is looking at it from, you're going to get a more interesting photo.
#8 - Don’t get disheartened
Now tip number eight is a little bit different because it's more of a mindset tip rather than an actual photography one! And that tip is to not get disheartened.
I see so many people start out in photography and they're full of enthusiasm, but as they get going, they realize that they have to learn this one thing…..and then that leads on to something else that they have to learn….. and then something else…..and before they know it, they start to feel really overwhelmed and they struggle to get the photos that they see in their head.
So I do want to let you know that every single photographer who ever lived, who has ever taken photos has probably felt disheartened way back in the very beginning. Nobody came out of the womb knowing how to use a camera and how to take great photos.
And there's lots of different elements to photography, which is why I it makes it such a wonderful hobby, but you’ve also got all these different pieces of the puzzle. And when you're starting out, you can't see that whole picture yet as you've only got a couple of pieces of the puzzle, but every single thing you learn is taking you one step closer, or adding another piece into that puzzle.
So don't get disheartened if your photos don't look the way that you want them to yet, just within a couple of weeks of starting out, so just keep going with it! I promise the more you learn, the more muscle memory you build in when using your camera, the better your images are going to look.
You ARE going to get better and better as you go along. I promise. (And if you want someone to walk you through it step by step freakin’ step, check out my Auto to Awesome program!)
#9 - Don’t stay in AUTO
Repeat after me: we don't want to use the auto modes on our camera. We don't even want to use the semi- automatic modes like aperture or shutter priority!
What we do want to do is learn manual mode. Now somebody somewhere is going to say, “Oh, but I know somebody who famous photographer who shoots in aperture priority mode”
You're probably right, there are, but they will know how to shoot in manual mode. When you know how to shoot in manual mode, that is when you really start to understand how your camera is going to react in certain situations, and you can THEN decide whether to shoot in a semi-automatic mode like aperture priority, or just switch to full manual. But the point is you will have that knowledge.
So I want you to move away from auto mode on your camera and yes, take that first step in something like aperture priority mode or shutter priority mode, This is going to allow you to choose just one setting and let your camera balance the exposure for you. You're going to find that much simpler to start with, and then just gradually take control of the camera, one step at a time, just like we do in my Auto to Awesome course.
But I also want you to move away from the other AUTO modes as well! For example, I don’t want you to have your camera selecting the focus point for you, and I don't want you to be using auto white balance, but I DO want you to layer this on gradually.
So when you start with your camera, you're going to be using everything on auto, and that is absolutely fine - in fact, that is exactly where you need to be. But then just gradually move away from all off the AUTO modes until you are taking full control of the camera, because I promise you, it's only when you take that control and don't leave it to the camera that you're going to get the images that you have been dreaming of.

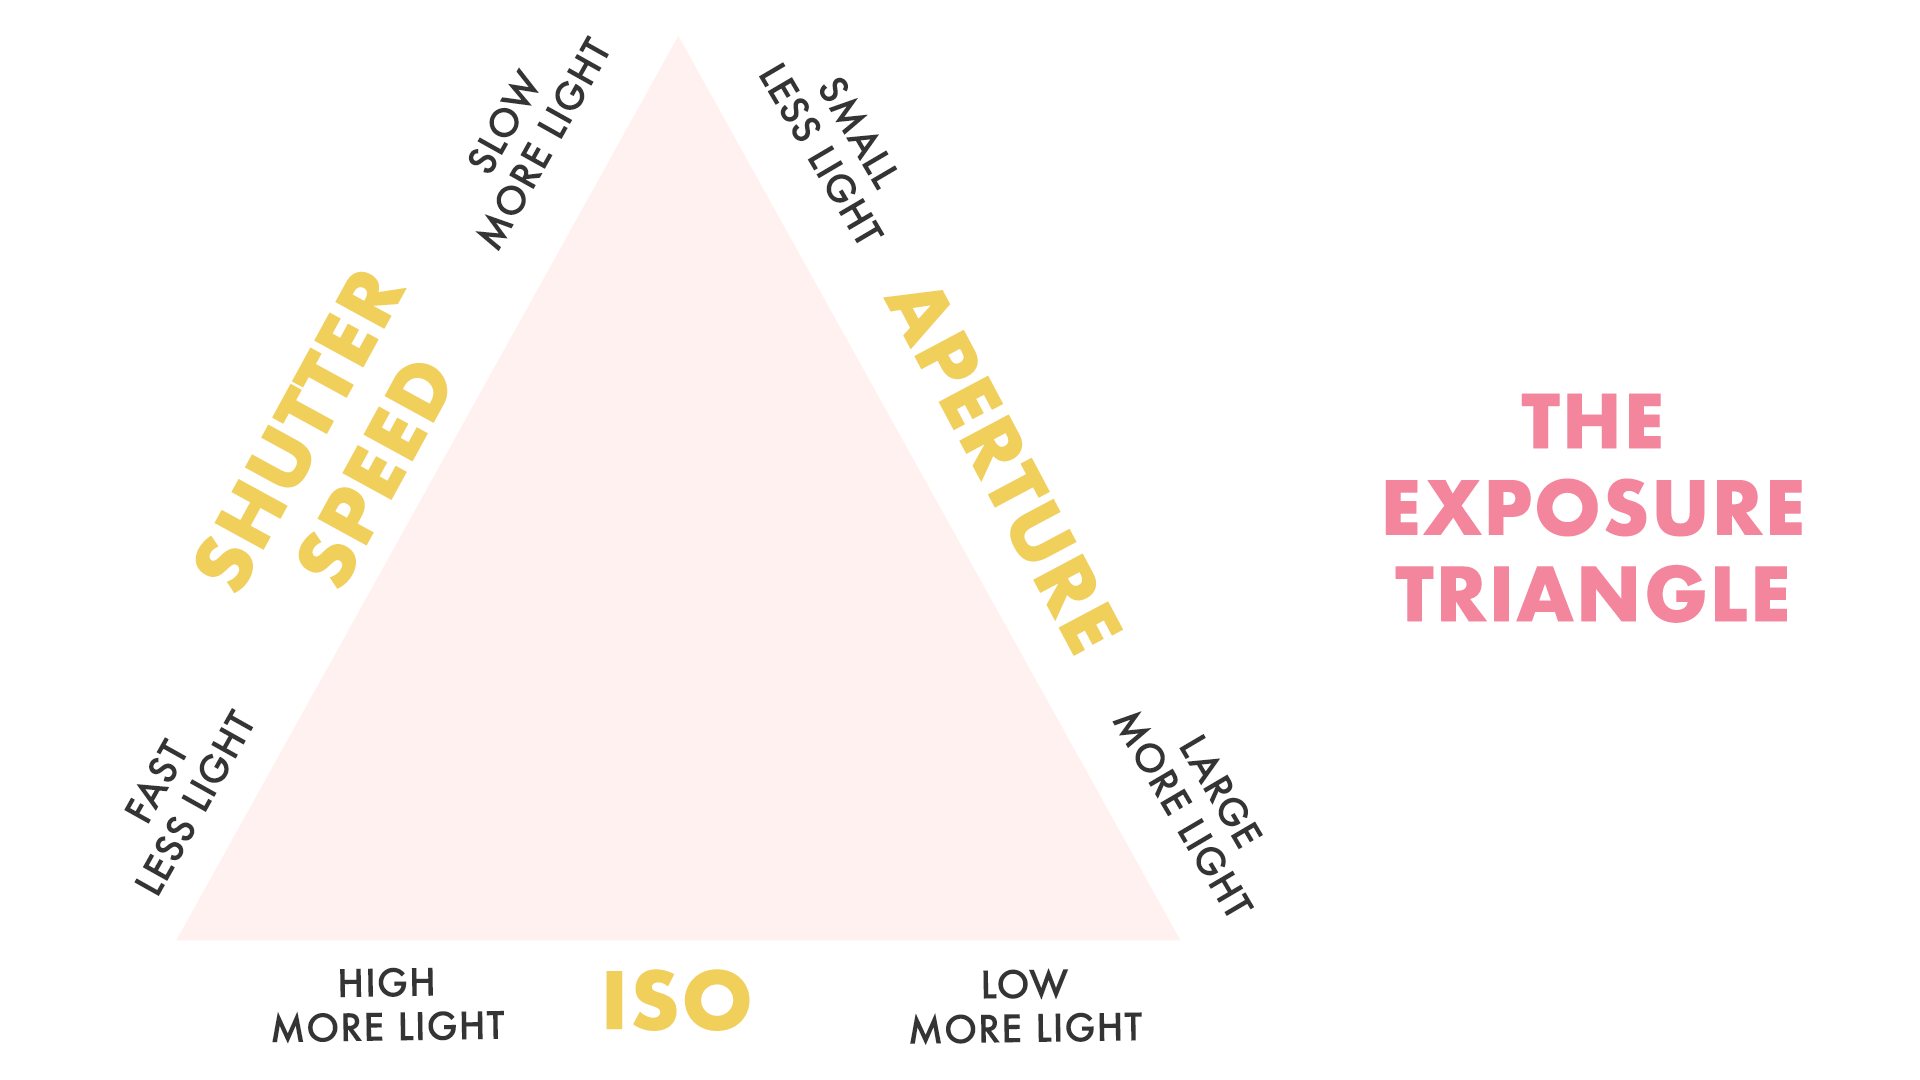
#10 - Start by learning the exposure triangle
This is where you're going to learn the building blocks of taking images, which is your three components of exposure: aperture, shutter speed and ISO. You’re going to learn how those three things work together in order to control our exposure, which is how light or how dark our images are, but also how they control how our images look.
By taking control of all three (which is what we do in manual mode) we can get our images to like exactly the way that we want them to, but we have to start by learning about what each one does and how they all work together in something called the triangle.
Finally, be sure to follow me on Instagram as well! I share lots of good stuff there: lots of tips, lots of tutorials, lots of behind-the-scenes content, so go here and click on that follow button.
And finally, don’t leave without grabbing your free 90 day learning blueprint (or you’ll be kicking yourself in about a week 😉) Just click on the image below to grab your free copy: