
5 Ways To Use Movement in Photography
Incorporating movement in photography is a great way to add a little something extra to your images and take them to the next level!
Movement can give you photos a more dynamic look, help us see things in a way that we simply couldn’t with the naked eye, or just allow us to unleash our inner artist :)
It’s also just damned fun to experiment with, so today, I’m going to share with you 5 different ways you can use movement in your photos, with some tips and example photos to get you started with each one.
Ready? let’s dive in!

1 - Suspended Movement in Photography
The first type of movement in photography - and possibly the most used one - is suspended movement.
This is where you freeze an action in mid-moment, so you can capture an image of something that you simply cannot see with the naked eye. Because we can’t naturally see it, this type of image is an incredibly compelling way to show movement in pictures.
For photographs of people, this could be someone jumping, running, dancing, twirling, skipping or even just tossing their hair or twirling their dress - any kind of movement where you essentially “pause” the scene on that split second movement.
But of course, it doesn’t have to be a person - a bird just before it lands on a branch (or takes off) or the crest of a wave just as it crashes onto the beach are all good examples of suspended movement too.
The key thing to note about photographing movement in this way is that you will need a high shutter speed in order to “freeze” the motion.
The exact number will change depending on what you are photographing, but at least 1/250 going up to around 1/1500. The faster the motion, the faster the shutter speed needs to be!
(Of course, the shutter speed you use is only ONE element of getting a sharp photo, which is why we have a whole module devoted to it in my Auto to Awesome program!)
I would also recommend that you use the continuous shooting mode in your camera so you can choose from few different frames as It can be difficult to pin down the EXACT split second you want to capture.
Here are a couple of examples of suspended movement in photography:


2 - Motion Blur Photography
The next way to show movement in photography is to SHOW the motion through motion blur. This is such a powerful technique when done with intent!
Now, you can get unwanted motion blur by using too slow a shutter speed for your intended subjects, which (when not done intentionally) will leave your images looking a little bit soft and snapshotty, which of course, we all want to avoid :-)
(Want to know how to avoid it? Read this guide “Why Are My Photos Blurry?” to get you started!)
This can lead to new photographers thinking ALL motion blur is bad, but it isn’t! The key is to use it intentionally and deliberately.
There are a couple of ways to do this - the first is by showing the movement of a subject, by having the subject blurred, but the rest of the image sharp, and the second is by blurring the background but keeping the subject sharp, which is called panning.
We’ll move onto panning in just a mo, but for now, let’s just look at that first one, where you show you the movement of the subject by having them blurred.
For this, you need a moving subject, such as a person running or dancing, twirling (in fact, all the things we mentioned for freezing motion!) or a dog running, or any moving subject such as a car or bike.
Don’t stick to just the obvious options though - clouds will move across the sky, or a skirt will billow in the breeze, so keep an eye out for these more subtle types of motion too.
For this, you want to use a SLOW shutter speed - this leaves the shutter open for a longer time, which causes the movement to be shown in the picture. The exact number to use will vary depending on your subject, but start at around 1/50 and go from there!
I’ve also got a guide to photographing motion blur here, so do check that out too.
A tripod can be really useful here, than means that the rest of the image can stay sharp whilst only the motion of the subject is blurred.


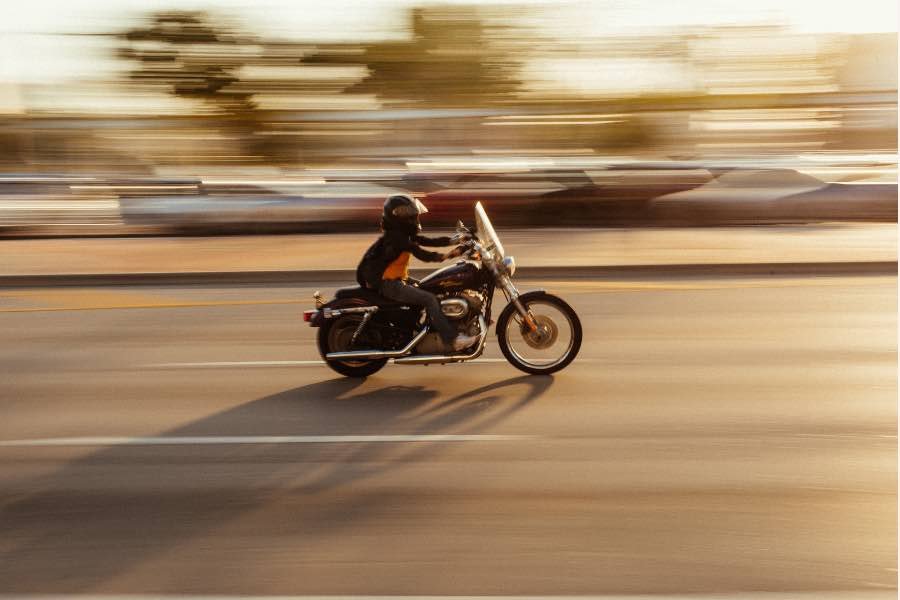
3 - Panning
Panning is a little more of an advanced way of showing movement in photography, so it can be a little more difficult to master and get an image you actually like, but the results can be worth the effort!
This is where you “follow” the movement of your subject with your camera, using a slower shutter speed than normal, so that you get a blurred background but a sharp subject (or at least a somewhat sharp subject!)
Panning works best - and is easiest to do - with subjects that are following a straight path, if you choose one that zig zags across the frame the result can be a little messy!
You also want a subject that goes directly across the frame - it doesn’t work for subjects coming toward or away from you.
So, to do this, choose a slower shutter speed than normal, and follow the motion of the subject with your camera. Press the shutter, and continue to move the camera, even after the shutter has closed.

4- Intentional Camera Movement
Next up in our tour of how to photograph movement is intentional camera movement.
This is when there is not actually anything moving in the frame, but you move your camera to create an abstract shot with a feeling of movement.
To do this, use a slower shutter speed and move your camera horizontally or vertically to create a pleasing abstract shot, OR you can zoom in or out with your lens to get a different effect (heck, you can even twirl your camera around 360 degrees if you want!)
The only rule is…..there are no rules :)
Instead think about the colours of the scene, and how they will work when blended together such as in the example below:

5 - Time Lapse / Chronophotography
The final way to incorporate movement in photography is to take time lapse or chronophotography images.
These are when you take a number of images over a period of time, and then pop them together in a multi-exposure image (or you can create a film with them if that’s your desire!)
An example of this might be showing the trajectory of the moon in the sky, or several shots to show a dancer in motion, your child shooting a hoop, or a flower opening like in the example below!
I’m not going to get into the nuts and bolts of this type of photography here (mainly because I don’t do it!) but you can learn exactly how to do it in this excellent article “Beginners Guide to Time Lapse Photography” over on Medium.
So there you have it! 5 ways to incorporate movement in photography.
Ready to try it out?
The best way to photograph movement effectively is just to start experimenting!
Approach a scene and try to photograph it in a few ways - use a fast shutter speed to capture suspended movement, and then photograph the same subject, this time with a slow shutter speed to capture motion blur. If you feel like going a step further, next try panning the exact same scene.
You can also look at the work from other photographers, and see how they show movement in their photos - it might spark an idea or two for you!
KEEP ON READING
How to Photograph Movement with Motion Blur
101 things to photograph (with ideas and examples!)
How to Create Ghostly Photos for Halloween!
Example Photos with Camera Settings
Why your focusing technique might be leading to soft images
Over to you!
How do you show movement in photography? Let me know below!
