5 Photography Lighting Mistakes (& How to Avoid Them)
Understanding light and how it behaves can be key to getting interesting images, flattering portraits and lifting your images to the next level…..
….but of course, it’s photography, which means it’s not always plain sailing :)
Here’s just a few of the mistakes I’ve personally made with photography when it comes to lighting - some of them subtle, many of them less so!
Check ‘em out so you can see what to avoid…

Before we dive in, I just quickly wanted to let you know about a brand spankin’ new freebie I have for you, your Photography Lighting Starter Guide! You'll learn all about the building blocks of light - its colour, intensity and direction - along with some ideas for using each one to kickstart your creative juices. Plus you'll get the questions you should ask yourself about the light when shooting, so you can put it all into action! Go here to download it.
1. Mixing Light Sources
Light sources can be anything: the light from the sun, or your indoor lamps, or even a streetlight! But each one of those has its own colour “temperature”, in other words, it’s own mix of yellow, blue, magenta and green.
When we set our white balance, we do so in order to “balance” these four colours so that our images look true to life, and don’t have nasty colour casts that can make our subjects look they are related to a Smurf, or spent too long in the sun :)
If you mix light sources - for example you have natural light coming in through a window and a lamp light on - then you’re mixing different colour temperatures. The problem is, your camera can only set the white balance for ONE of these at a time, so half your image will be the wrong colour if you mix light sources.
Although you can sometimes use this to creative effect (and it can look wonderful - the image below uses this in a more creative way) we generally want to keep the light on our subject the same, so a simple way to avoid it is to stick to ONE light source. So say you find yourself with natural light coming in and a lamp on, then switch off the lamp light, or close the blinds and use lamp light only!
Of course, if you don’t have the option to change the light then you can fix it to a degree in processing, but it’s much simpler to avoid it in the first place, and will save you oodles of time.
As a side note, if you’re often turning on your household lamps at home to “boost” the natural light, you can also buy daylight bulbs for your lamps which means that that they will be the same colour “temperature” as daylight!
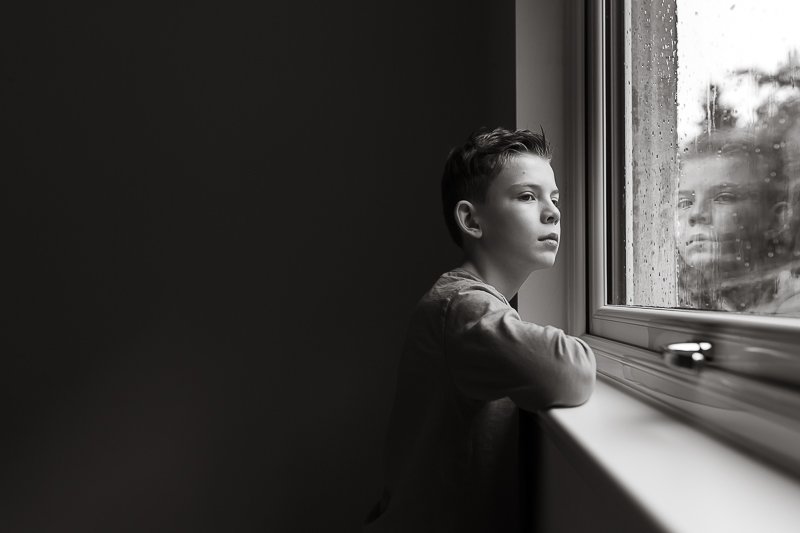
2. Lighting from below
Have you ever held a flashlight under your chin for a “spooky” effect at Halloween? That is what I can “ghoul” lighting, because when lit from below, you get an unnatural look to your images.
Now, when using natural light, you won’t get such a dramatic effect as you would with a flashlight, but even subtle uplighting can lead to shadows in the wrong places. In people this would be above the cheeks and under the eyes. (you can see an example of this in the image below!)
Watch out for uplighting on your subject and change their position if you see it. An easy way to do this with people is to check the eyes, as the catchlights are a great indication of the position of the light source!
Simply imagine the eye as a clock, and if the catchlights are any lower than 9 o clock or 3 o clock, then you’re lighting your subject from below and should take steps to avoid it.

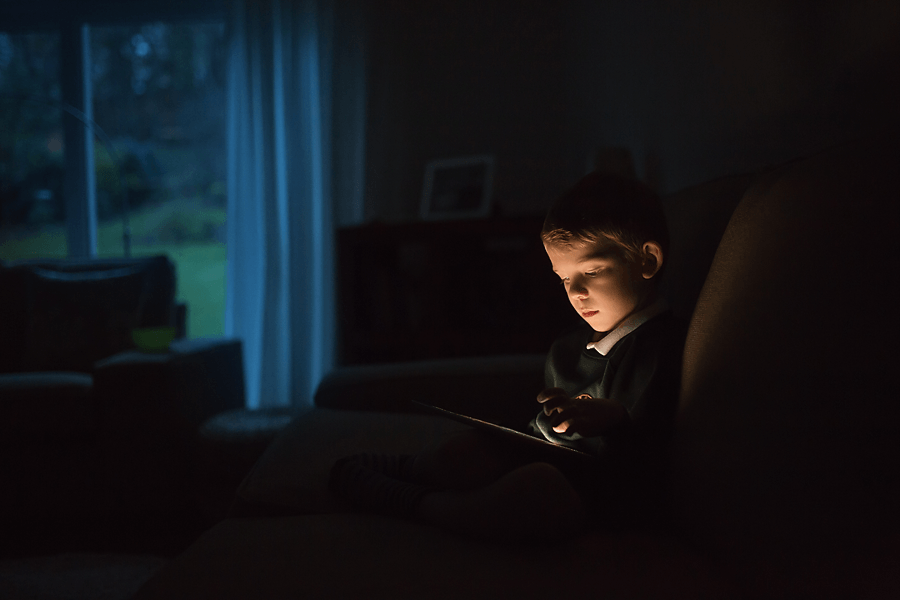
3. Not Using Low Light
So many people shy away from using low light but it can create absolutely wonderful images - in fact, some of my most favourite photos ever were taken in low light!
Avoiding it also means that you end up not taking pictures for half the day - at dawn when the light is breaking is magical, and dusk can give an ethereal look to your photos.
But even after the sun has gone away for the day there are still loads of options for photos, for example using lamps, street lights or tablet light as your light source.
When using low light, knowing how to expose correctly is key, so that you don’t blow the highlights, or have an underexposed image (which just makes noise worse) so using spot metering and shooting in manual mode is the way to go!

4. Avoiding Midday Sun
At the other end of the scale is avoiding midday light, and yes, again, new photographers should avoid this because the light is harder to work with.
However, once you are shooting in manual mode, you should take up the challenge of shooting at midday, because it can also give you a wonderful range of photos!
Sure, it won’t give you the warm hazy images that you get during the golden hour, but it does have it’s own advantages - colours look deeper and more saturated, so you can get really fun images, plus the hard shadows can be fun to play with!
And of course, you can also go into the shade for another range of photos entirely, so shooting in full sun can give you a wonderfully diverse range of images.
So if you’ve been avoiding midday light, it’s time to get out there and play!

5. Not practicing with different types of light
Light is the key ingredient in our photos that can lift them up to otherworldly status, help you get more creative shots, uplevel your portraits, and generally make your photos look awesome.
Subtle changes in the light, your shooting position, your subject’s position and the elements around you can have a big impact on your images, so get out there and start experimenting!
(Don’t forget I have that free photography lighting starter guide to help you too! You can download it here)
Look at the light around you during the day, and at night after the sun has gone away.
Get out there in harsh midday sun or low light foggy days.
Grab the camera when your partner is reading by lamplight, or your son is watching TV.
Get out in the rain and snow and make it look magical. (If you’re worried about putting your camera out in the rain you can buy a cover for it for around $15!)
Over to you!
A great way to force yourself to experiment with different types of light is to try a day in the life project - this is when you take photos from the moment you wake up, to the moment you go to bed.
Just by spanning one single day, you’ll find that you’re shooting in many, many different types of light, so it’s a fab thing to do when you’re ready to experiment with light!
Now, tell me, what natural light mistakes have you found yourself making, or is there any type of light you try to avoid? Let me know in the comments below!
If you enjoyed this post, please be sure to share! This simple act helps keeps small blogs like myself alive and kicking, so take a moment to pin in to your Pinterest boards, share on Facebook or Twitter, or just mention Live Snap Love on Instagram!
Until next week,
xo, Audrey