
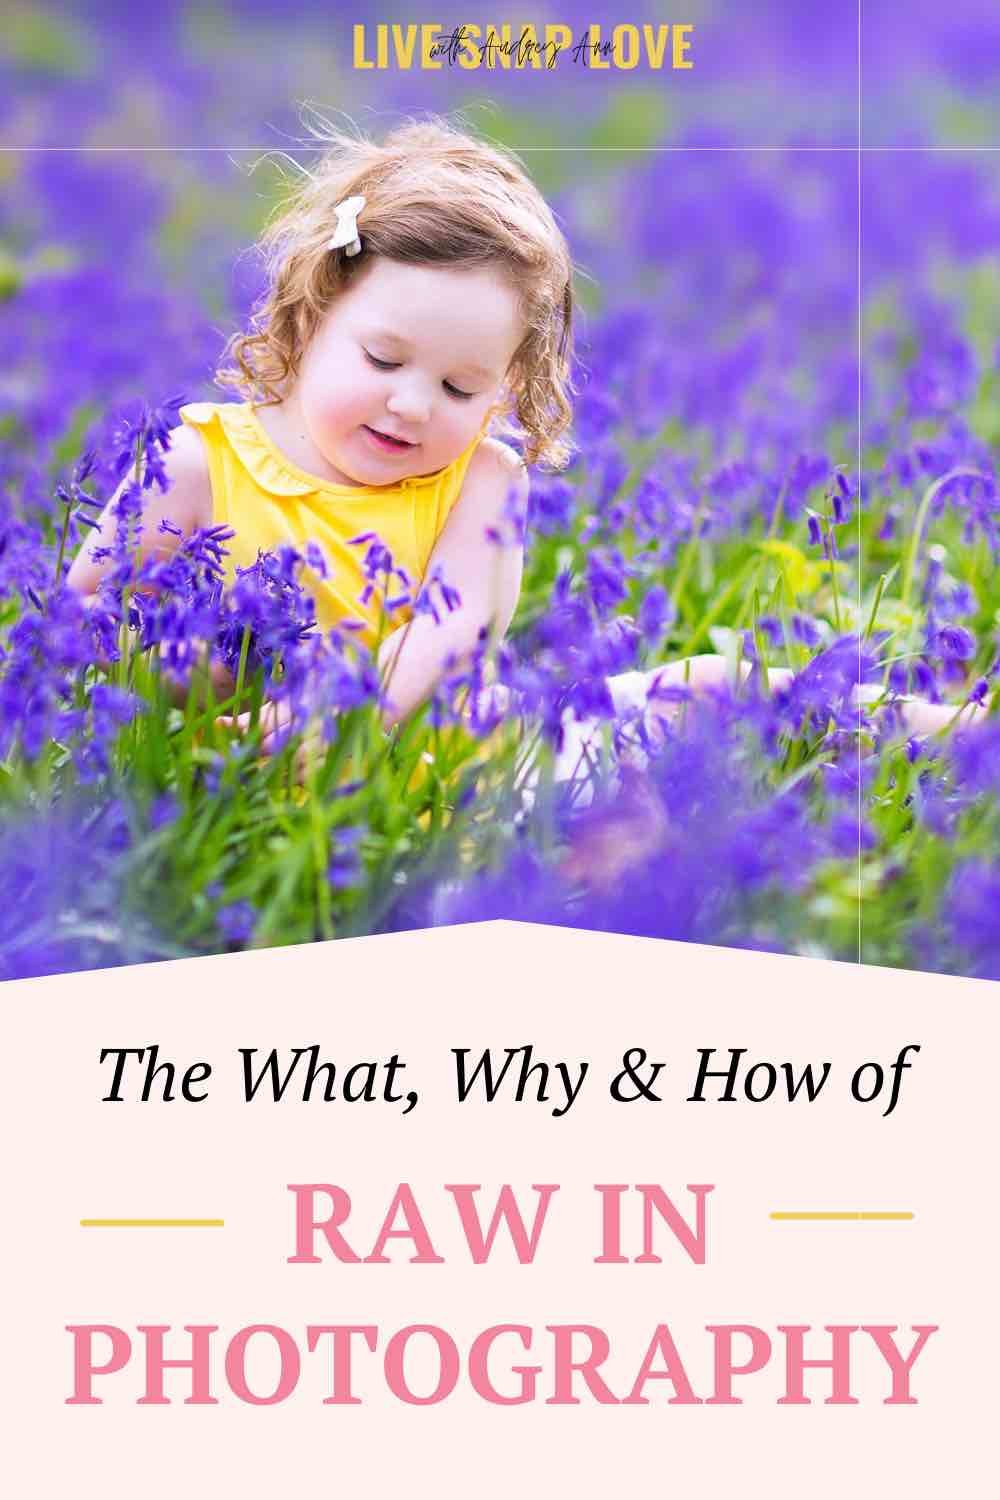
RAW in Photography: What, Why and How to Shoot in RAW
If you're new to photography, you may have heard the term "RAW" thrown around, but what exactly does it mean?!
Or maybe you’ve been hearing over and over again that you need to switch to shooting in RAW, but you don’t know why you might want to, and if you did, how you do it?!
If so, you’re not alone!
When I first started out, I didn’t even have a clue what RAW in photography was, never mind why I might want to shoot in RAW!
So today, we'll explore the benefits of shooting in RAW and how it can help you unlock the full potential of your camera, and give you all the information you need to help you decide whether shooting in RAW is for you!
What is RAW in photography?
The RAW format in photography is just a file format (just the same as JPEG is a file format, or a PNG, or a PDF) and it’s the format your camera first records your image in when you press the shutter.
Now for most cameras, you will get the option to use two different formats: JPEG or RAW.
What is important to note is that every single camera will first take the image in this RAW format first, even if you have set it to do so!
As such, the RAW format is a data file that is completely unprocessed by the camera, and therefore contains ALL the information that was there when you pressed the shutter.
However, when you shoot in JPEG, the camera takes that RAW file, and processes it, usually by automatically adding contrast, a color boost, sharpening and running noise reduction.
It then flattens the RAW file, getting rid of any of the recorded information that it didn’t need, and compresses it to a smaller file size and saves it in the JPEG format.
So simply put, a RAW file is the “original” image data as the camera recorded it, whereas a JPEG is what you get when you process and convert that raw file into JPEG format (Or as I like to think of it: “cook” the RAW file!)
What does RAW stand for?
Nothing! RAW is not an acronym, so technically speaking, it should just be written “raw”
However, many people in photography (probably the majority) write RAW in capitals, probably because it helps show that it refers to a file type.
I’m no word purist, so I couldn’t give a flying monkey, which is why I’ll write RAW for the sake of clarity in this guide, but raw works equally well :)
Is it better to shoot in RAW?
In a nutshell, yes!! There are several benefits to shooting in RAW format in photography.
As the file is not compressed in any way, the quality of a RAW file is significantly higher.
This is because the full range of data is recorded, so it can help you recover highlights you thought were lost, allow you to easily change white balance, and "rescue" images that were under or over exposed.
In fact, you’ll instantly notice a massive difference in sizes between a RAW and a JPEG one, even of the same scene, because the raw file has so much more information recorded!
That higher quality is really important to most professional photographers, along with serious photography enthusiasts, which is why most (but not all) photographers will shoot in RAW.

Benefits of shooting in RAW format.
I can hear you thinking to yourself “Higher quality sounds good, but what actually improves by shooting in RAW? How does this help my photography?”.
Guess what, I’m about to tell you :)
There are a whole host of benefits when you shoot in RAW namely:
#1 - Raw record the full range of brightness
Your “uncooked” RAW file contains around 4,000 - 16,000 levels of brightness, whereas a JPEG records around 256.
If those numbers mean little to you (as quite frankly, they do to me) then here is why that’s important:
When you have that full range of brightness recorded, it means that you can easily make adjustments to your image, such as exposure, highlights, whites, shadows, blacks and contrast, in order to get the scene looking exactly the way you want it to.
Let’s say you were to shoot a backlit image, and your subject is too dark, and your background is too bright so it’s “blown out” and there’s no detail there.
If you shot in JPEG, that might be the best you can do, but with RAW, you can take bring back the shadows to lighten your subject, and take down the highlights and whites in order to bring detail back into the sky.
(You can read about how to fix and overexposed sky in Lightroom here!)
#2 - You can easily adjust white balance
When you shoot in JPEG, the white balance is “cooked” into the image, so you can’t easily change it.
But if you shoot in RAW, although the white balance you chose is recorded, you can easily change it and choose another option in your editing software, such as in Lightroom or Photoshop.
So, that’s 2 of the major components of photography - exposure and white balance - that are most easily fixed or changed, just by shooting in the RAW format!
#3 - YOU get to decide how the photo looks!
One of the major downsides to shooting in JPEG rather than RAW is that the editing is done in camera.
Your DSLR or mirrorless (y’know that bunch of wires and sensors that can’t actually SEE an image) applies a predetermined amount of brightness, contrast, noise reduction & sharpening, that doesn’t take into account what the image actually NEEDS.
Believe or not, you are much, much cleverer than your camera, so the very best person to edit your photos is YOU.
#4 You can take advantage of better detail adjustments
Editing processors like Lightroom have much, much, much better sharpening and noise reduction algorithms than your DSLR or mirrorless does, so you’ll get better detail if you do it yourself rather than leaving it up to your camera!

# 5 - You’ll get less banding
Banding is when you see a “band” between colour gradients, rather than a smooth flow between colours. You can often see this in studio backdrops or in a clear blue sky.
(I’m not going to go into banding in photography here, but you can read this article on Wikipedia on colour banding to learn more about it!)
All I will say is that shooting in RAW gives you a much, much better chance of not getting it, again due to the fact that the raw file contains more data.
Sounds great! So what’s the catch?
It’s true, there’s no such thing as a free lunch, so there is a bit more work required as the trade off for all those aforementioned benefits.
Here’s some of the downsides to changing to shoot in RAW:
You Get Larger File Sizes when you shoot in RAW
The first downside is one that I mentioned earlier - the file sizes.
Raw file sizes are HUGE because they have to hold all that extra data!
A raw file size is around 20Mb, whereas a JPEG might be around 5 - 8 Mb, so there’s a big difference in size.
This can be a concern if you store all your images on your computer hard drive…..but I would never recommend that you do that anyway.
One of the first things I recommend to my Launch into Lightroom students is that they buy themselves an external hard drive for storing their images, and you can pick these up relatively cheaply these days, as the cost of storage comes down.
(This is the external hard drive I use for storing all my photography files!)
Because of these larger image sizes, you’ll also need a larger memory card, but again, the price of these keeps falling for larger and larger cards: at the time of writing this you can get a 128gb card for just $30 from Amazon.
Finally, larger sizes also mean that you want to make sure that your memory card can keep up without “buffering”, so be sure to buy one with a fast write speed.
2. You Need to Process the RAW File
With JPEG, the image is processed for you, and you are able to share and print your photos the second you download them.
If you shoot in RAW, you can’t, because the file needs to be processed and converted to a shareable format.
If you are incredibly time-pushed, and have no intention of editing your images ever (although I really don’t recommend that - editing is as much part of the photography process as what you do when shooting!) then RAW is not for you.
For everyone else, particularly if you intend to edit your pictures, the little bit of extra time you’ll spend on editing a RAW image is well worth the trade off. (However, I would argue it’s no more time consuming, because you would probably edit the photo anyway!)
Should beginners shoot in RAW?
A question I often get asked is whether photography beginners will benefit from switching to shoot in raw…..and the answer is YES! That way you can more easily rectify any mistakes you make.
New photographers are more likely to get the white balance or exposure wrong (because they are usually using AUTO modes, which mostly get it wrong!)
By shooting in RAW, you can fix those before anyone even knows 🤫
So, now that you are aware of what raw in photography IS, along with the benefits of shooting in RAW - and the downsides - let’s move onto the practicalities of making the switch.
How to set your camera to shoot in RAW.
Luckily, setting your camera to shoot in RAW format is a simple process! Here are the steps to set your camera to shoot in RAW:
This is the same whether you shoot Canon or Nikon (or anyone else for that matter!)
Every camera is different so I’m not going to be able to map this out for you exactly, but generally speaking, find a menu option called IMAGE QUALITY or similar. (If you can’t find it, you’ll need to search on your manual)
There you will see that you have the option to shoot in JPEG, JPEG + RAW, or just RAW.
Of course, you’ll need to select RAW.
Here’s how to shoot in RAW on a Canon 6d (but the process will be similar for all Canons) and how to shoot in Raw in Nikon on the D780 (ditto)

If you’re a little concerned about switching to shoot in raw, and would like to have the safety net of having the camera shoot a JPEG file too, choose RAW + JPEG so you have both. (Don’t do this forever though, as there’s no point, so just until you feel a little more comfortable!)
Once you have made the switch to shoot in RAW, there’s nothing else you need to do here - you’re done with this bit!!
Understanding the RAW workflow….
Once you have captured your images in RAW format, it's important to understand the workflow for processing and editing.
Because what do in camera is only one side of the equation, because you will also need editing software to open and edit your RAW file - you can’t view it using your normal windows / mac photo viewer like other image file types.
There are loads of editing software on the market (and you will usually get a free basic editing program from Canon or Nikon that is capable of editing raw images if you don’t feel ready to invest in one) but the software I recommend is Lightroom Classic.
In fact, I recommend that you get the photography plan from Adobe, that way you get Lightroom Classic for managing and editing your photos, Lightroom CC for editing on the go when required, AND Photoshop for more advanced pixel editing. (Don’t just get Lightroom CC, get the Photography Plan - you get far more for your money!)
Of the 3 you will probably use Lightroom Classic the most, but having access to Photoshop gives you a whole wealth of options for editing that you’ll definitely want at some point!
Whatever software you use, once you have uploaded your pictures, open your raw image processor.
If you are using Photoshop or Photoshop Elements, go to FILE / OPEN and open your file - this will automatically open your image in ACR (Photoshop Elements RAW processor).
In Lightroom, you don’t need to do anything different as it opens RAW photos in the same way - you'll just need to import them into Lightroom first to view them.
I won’t go into how to do edit your photos here, but if you download our free LIghtroom Starter Kit, you’ll get a Lightroom editing checklist, plus a guide to importing and exporting in Lightroom Classic , PLUS I’m going to send you a free training with some editing steps to help your photos pop like the pros!
Go ahead right now and download that. ( (I did mention it’s totally free right?!) before you forget so you’ve got a wealth of resources to help you with all of this!
After you have edited your photos, you then need to export them as a small resolution image for sharing your beautiful photography with the world on social media, or in full resolution for sending to the printers.
Editing RAW files for optimal results.
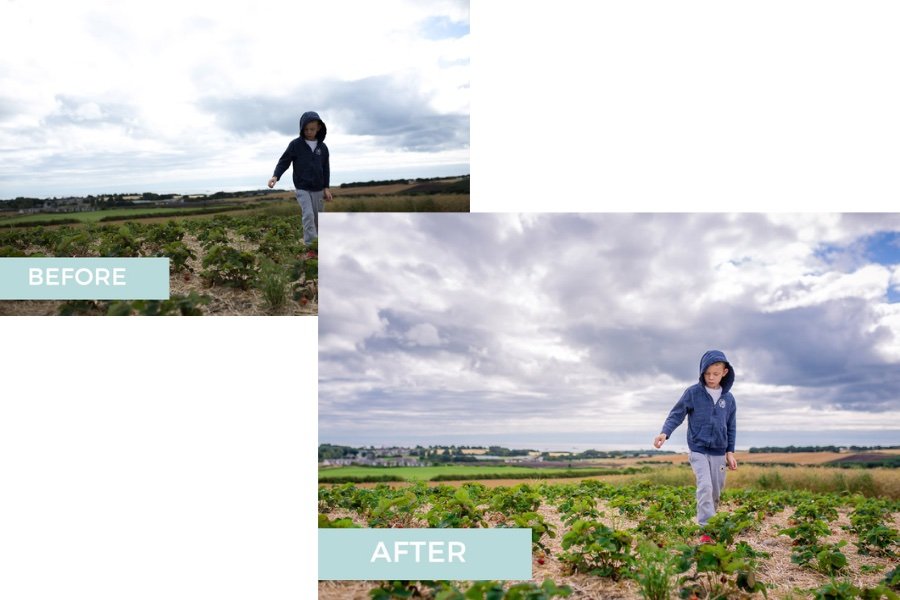
Editing RAW files is an essential step in shooting in the RAW file format!
So many of my photography students get a shock because they see that their JPEG looks better than their RAW counterpart, and there’s an easy reason for that! (You can see some RAW examples and the finished image here!)
As we said earlier, RAW photos are completely unprocessed, whereas JPEG have some processing applied, which mean they will have better brightness and contrast . YOU need to edit your image to make it look as good - in fact, BETTER!
I actually have a preset that I use on import into Lightroom that gives me a much better image straight off, which I then tweak for each image. (You can get these import presets, plus a whole load of other ones inside my Launch into Lightroom program!)

Raw in Photography Summary….
There really is no contest - shooting in RAW gives you more control in editing, so it’s an obvious choice for those serious about their photography.
HOWEVER, there are times when shooting in JPEG makes more sense. If I’m being a happy snapper taking hundreds of images on a day out, let’s say in Disneyland, then I might switch away, just because it’s a little bit quicker and easier at the other end.
But when I care about the final output, and I have my “photography” hat on, then I would always shoot in RAW, because of the extra options it gives me in editing.
Some other posts I think you’ll like….
How To Make The Switch to RAW (step by step guide)
Lightroom Workflow for Beginners (great even if you don’t use Lightroom to see the steps after uploading your photos!)
7 Deadly Photo Editing Sins (and how to avoid them!)
12 Lightroom Before and After Examples
And don’t forget to download your FREE Lightroom Starter Kit too!
Are you ready to shoot in RAW?!
I hope you enjoyed this introduction into what RAW in photography is, and most importantly, how you can make the switch to shoot in RAW.
Will you be making the switch and shooting in RAW? Let me know in the comments below!