
How to make a photo collage from prints
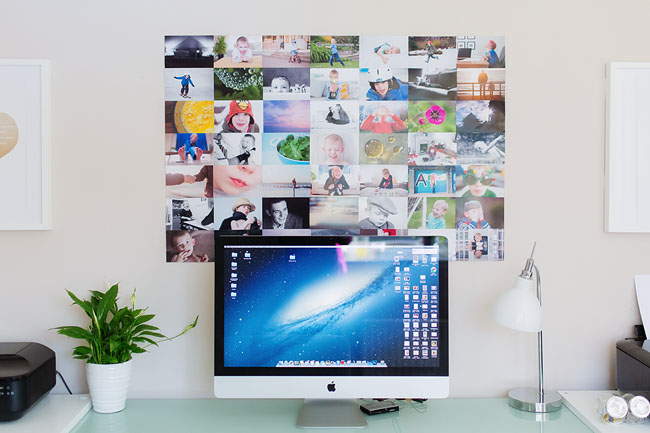
I'm in the middle of giving my home office a bit of a makeover and have just made one of these photo collage prints for over my computer desk so I thought I'd give you a bit of a tutorial on it!
I am forever changing out images (drives my husband insane) so over the years I have grown adverse to actually hammering any nails into the wall so this particular way of displaying photos is ideal if you feel the same way.
Creating a collage also allows me to show lots of completely different lifestyle images, without having to worry that they are not "arty" or making sure that they go together - again, ideal since that is the type of images I mainly take! The best thing is it is so simple to do, and you can have it up on your wall in a couple of hours tops so there's instant gratification.
Here's how to do it:

STEP ONE: COLLATE YOUR IMAGES
The first thing I did was decide how big I wanted the collage to be. I wanted it to sit above my computer desk, so I got a rough idea in inches how wide and how tall I wanted it, then divided the width by 6 and the height by 4, which gave me how many images I was going to need overall.
Then, I just pulled images at random that I liked and copied them into one folder. I did more than I needed in case any didn't look quite right in the collage once printed. If you wanted a more uniform look to the images, then you could run an action such as a black and white so that they all look similar, however I wanted them to look all different so that there was lots of different colours going on.

STEP TWO: PRINT YOUR IMAGES
Then I printed out the images onto 6x4 paper. I did this at home, but of course you go to a printers instead. If doing this at home, one point to note is that you should try to print all the photos on the same paper. I ran out halfway through, went to buy a new pack and finished it on them. Because they were made by different manufacturers, there was a tiny difference in the size, which was a bit of pain to workaround when putting them together. Who knew?

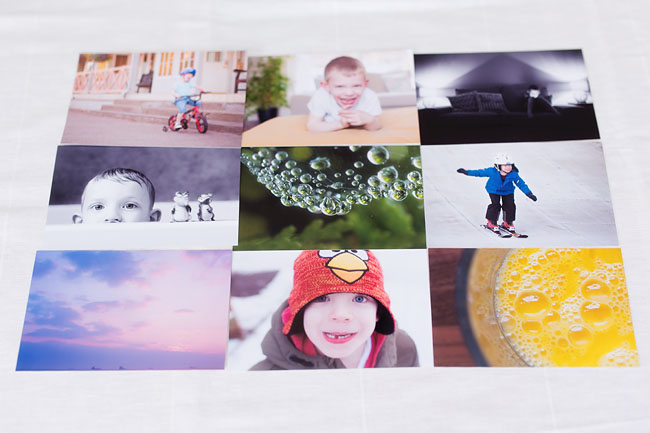
STEP THREE: GET THE LAYOUT RIGHT
If you want to see how it looks before it goes together, lay out your images on the ground first I pretty much did this at random and just switched one or two around if two black and whites ended up together for example.
STEP THREE: STICK THEM TOGETHER!
This next bit is easier to do in sections - so I split roughly the collage into four quarters and worked on a section at a time.

Work on the first row of your first quarter. Line up your first image with your second image, both lying face down. To make sure they are aligned correctly just use a ruler or other straight surface to lean the bottom edge up against.
Once you are sure they are flush, tape the two images together with clear tape on the back side. Repeat until you have the first row of your first section taped together. (If you do want them in a particular order, make sure you flip them over so that they stay in the same location - my poor brain couldn't get it's head around this so some of them didn't end up in the same position as my original layout - didn't make much difference overall though!)

STEP FIVE: TAPE YOUR ROWS TOGETHER
Once you have done all the rows in your first section, it's time to tape these rows together. Simply lay the first row above the second row, and make sure the edges are flush. Tape the two rows together at the back. Continue taping the rows together until you have your first section completed.

Repeat the same procedure with the 3 remaining quarters. You will now have your large mosaic in four manageable sections.
STEP FIVE: TAPE YOUR SECTIONS TOGETHER
If your mosaic is small enough, simply tape these four sections together at the back, again making sure that the edges are flush. This is what I did since it was reasonably small. If it is quite large, it might be easier to keep it in four sections and line them up on the wall.
STEP FIVE: DISPLAY YOUR COLLAGE
I used white tack (the putty kind of stuff) to put the collage on the wall, but glue dots would also work (I just wasn't sure if that would take the paint off when it was time to take it down so I erred on the side of caution with that one!) I put the white tack on each corner of the photos at the edge of the mosaic, and then a dot in the middle of all the rest.

You can make sure your mosaic is going to be straight by using a spirit level and marking the line with a pencil where you want the top of the mosaic to be and then press into place, going along each photo and pressing where the putty is. (If you have done it in four sections, just make sure they are flush with one another on the wall) I pretty much wing it, and hope for the best! I just pressed down a few corners so it was easy enough to move a little bit and get it into the right position, then firmly pressing along the edges and in the middle so that the edges sat against the wall.

Of course there are loads of options you could do with this - maybe arrange the pictures into the shape of a heart of a circle, or cover all one wall.
Anyway, I love my mosaic wall (Although I am thinking I would like a little bit bigger) - makes me happy every time I come in to work on the computer!