
Taking Better Images with your Pop Up Flash
You have probably heard numerous times that if you are trying to get better quality images and improve your photography, you shouldn’t use your cameras pop up flash. Why? Because it produces a very hard light which will a) look unnatural and give you lots of hard shadows b) hit your subject straight on so that he or she will look flat and drained and c) will probably always leave your subject with red-eye.
All in all, deeply unflattering!
For this reason, I definitely prefer taking images using natural light, and strive to do so, but there are times when you simply do need to use flash, for example taking photos indoors when there is little light available.
Enter the pop-up flash diffuser! These work by softening and diffusing the light from your on camera flash so that there is less harsh shadows, and is generally more flattering. Although they won’t create professionally lit images, they will most definitely help improve the quality of the shots enormously, and they are much friendlier on the wallet, at around $30 for a decent one. This allows you to use you pop-up flash, but gets rid of that "flashy" look - a win win!

How it Works:
It simply slips on over your flash using your hot shoe mount, and softens the light by re-directing it and bouncing it off a wall or ceiling, in much the same way that an external flash unit would (although admittedly with less power and control, but what do you expect for $30! For this reason if you are in a place with very high ceilings it won’t work too well, but for use in your house it’s usually ideal.
Simply slip on over your camera’s pop up flash and change your camera settings to those recommended by LightScoop and away you go! Just make sure you have a wall, window or ceiling behind you to bounce the flash off.

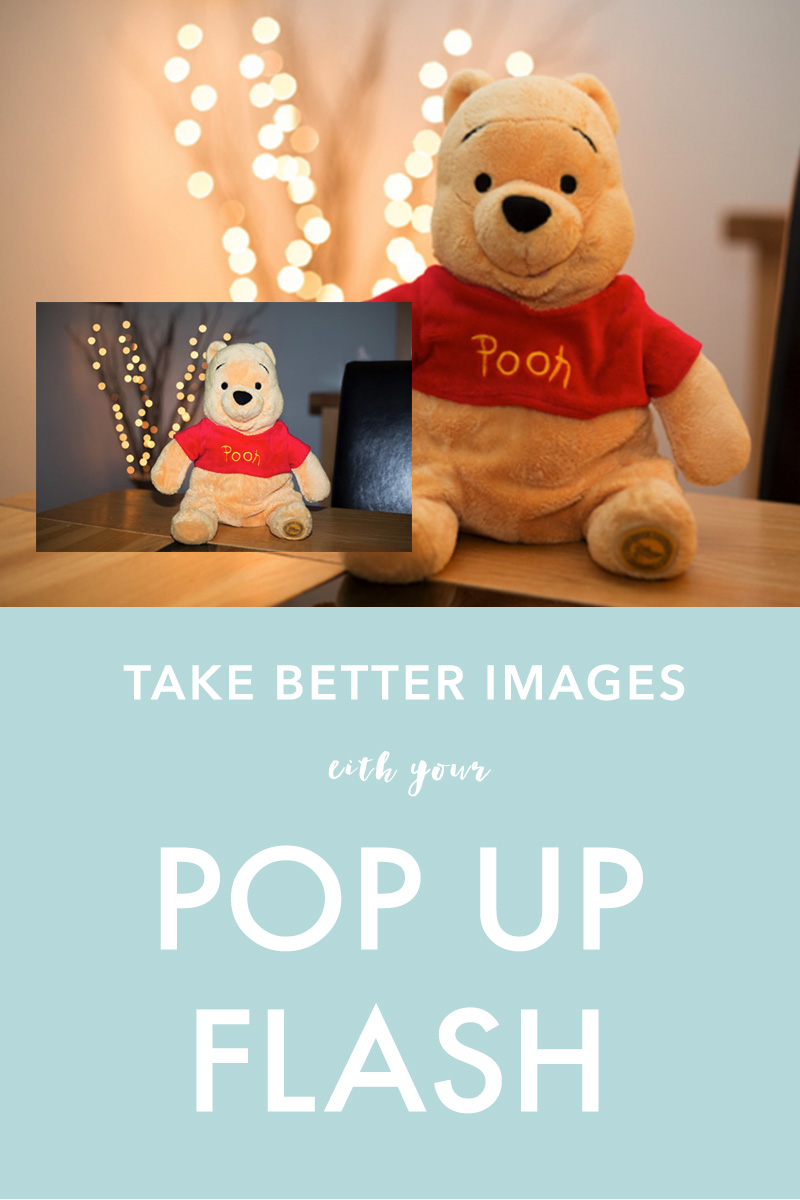
This is my completely unscientific experiment using a lemon - you can see the difference using the lightscoop made - the image taken with a high ISO is grainy - the flash one is overexposed and too bright, but the Lightscoop one is very natural looking.

Lightscoop Tips & Tricks
Here’s a couple of tips for helping you make the most of it.
- The lightscoop is only meant for use indoors - it needs a wall or ceiling to bounce the flash off so it won't work too well outdoors unless you are close to a building or similar structure.
- Make sure that there is a wall behind you when taking the photograph and try to use a light colored wall - a bright one can reflect the colour back onto your subject
- The instructions for use with my camera advised setting your ISO at 800. I actually set it at 400 and liked the results. would suggest playing with your settings until you find what works for you - you don’t HAVE to use it as they suggest - try using a lower ISO if you feel it is too high.
- There are two options for the Lightscooop - normal or warming - I would suggest normal as you can always warm up your photo in editing after if you require.
- If you turn your camera to portrait orientation, it creates a studio-like affect, or a more directional light (like would come from a window)
Of cousre, there are a different types of these around (just type in pop up flash diffuser into amazon) but this is the one I know works well, and I recommend because it is re-drecting the light like an external flash unit would, instead of just diffusing it, which most of the others offer.
Lastly, there are also DIY methods (none which I have tried myself though) which might work if you don't want to spend the cash, these include using a tissue, or a piece white piece of card (something like a business card would do) or translucent material like Vellum, and hold or affix these in front of the flash to soften and diffuse the light.