5 Ways to Save Yourself Countless Hours Each Week with Lightroom
Let’s be honest, the one thing that most of us have in common is that we struggle with not having enough hours in the day!
That’s why trying to find an extra hour or two to edit and manage your photos when you have about 874 bajillion OTHER things that need to be done that day can be trying to say the least.
I know this from experience: after I was a few years into photography I had gotten myself in a huge mess when it came to my photos, and I was spending hours each week trying to get them into some sort of order, not to mention carrying out long winded editing on all my photos.
One thing that made a huge difference to how much I could get through in less time was Lightroom Classic, so today, I want to show you 5 ways that Lightroom has saved me countless hours each week…

Edit multiple images with one click
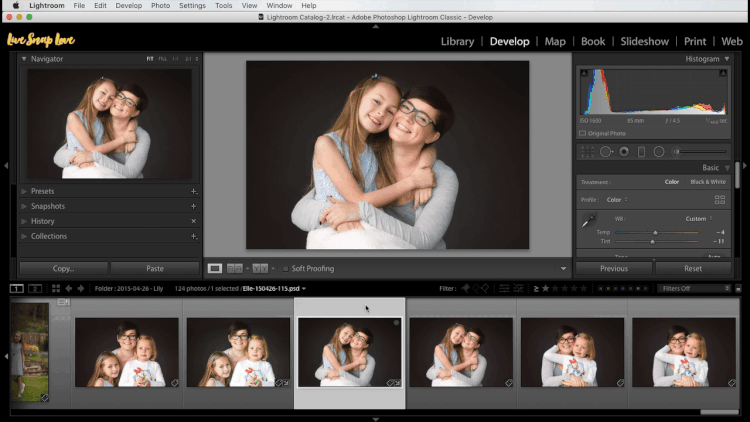
One of the loveliest features of Lightroom, and undoubtedly the most used when it comes to shaving hours of your editing time each week, is the ability to edit multiple images with one click of your mouse.
Let’s say you’ve taken some photos of your family at the beach. Edit just ONE photo the way you want to, and you can then transfer those edits to the OTHER images you took - whether that be 10 or 50. That means all your photos from one “session” have been edited in the time it takes to do just ONE. Me seriously ❤️
Watch this incredibly short video below to see how it’s done:
(Not sure what you should be doing in Lightroom? Then be sure to grab our FREE Lightroom Classic Starter Kit and get a guide to importing, a step by step editing checklist, and an exporting cheat sheet….all for free!

Create your photo book within Lightroom
This alone has saved me hundreds of hours each year AND making getting my photos out into the world where they belong much more likely!
Within Lightroom you have the Book module, and this is where you can create your photobooks right within Lightroom itself. Because you don’t need to export the images as JPEG’s, and then upload them again to your chosen printer, it saves you so much time. Plus as you can drag them into the book on an ongoing basis, you can add it as part of your workflow.

Use Keywords & Collections
How many times have you thought to yourself “Oh, I know the perfect photo for this! I took it sometime in 2018……now where is it……..it should be here somewhere….maybe in this folder…… where the @!$!*ing hell is it?!”
When you have your images keyworded correctly, then there is none of this. You simply go into Lightroom, type some attributes into the search bar, and hey presto, your image appears. (Marie Kondo eat your heart out)
I know that right now you might not have a lot of photos, so it can be relatively easy to keep track of everything. But once you’ve been photographing for years, the sheer volume of photographs becomes overwhelming, and you need to have some kind of system in place so you can find what you want, when you want it.
Lightroom is a maestro at organising your images - but of course you do need to set up your own system first. You put in a little bit of work upfront, but it pays you back tenfold!
We go into this a full organizational framework for you to follow in our step by step program Get Organized In Lightroom Classic, so you can get your system up and running within a couple of days so that you’ll never lose an image again, and save yourself a chunk of time each week in the process!

Create Export Presets
Once you have finished your editing, you’re probably going to want to share those images, either on Instagram, or Facebook, or maybe even prints for your wall.
As you will have different export settings for these with differing levels of sharpness, or different sizes, you can save time by creating your own export presets. That way, you only need to do the work once, create a preset for it, and then you can apply those settings in one mere click of your mouse.
Interested? Then go here to read how to create your own export presets in my step by step guide!

Create and use Import Presets
Whilst we are on the subject of presets, using presets upon import is a great way to speed up your workflow to help you shave off even more time each week!
Instead of importing your photos, then having to apply an editing preset, you can do both at the same time - well, actually, you don’t need to do anything, because Lightroom goes and does it all for you.
When importing, jus go the section that says “Apply During Import” (you can see it below) and under Develop Settings, choose a preset that you use all the time.

Now each of these on their own might only save you a little bit of time, but when you put it all TOGETHER you can import, manage, organise, edit and print your images in waaaaaay less time than you can using other editing programs.
(And in fact, I haven’t included the other half of things that save me time, like posting directly to Instagram, creating a collage, or automatically sending my finished edited photos to a client gallery)
But because Lightroom can do so much, it can be a little overwhelming - but once you get a system in place, it makes managing your images a breeze . And that’s exactly what we cover in Get Organized In Lightroom Classic
In that course, we get you set up with your own system for organising and managing your photos, so you have a beautifully organized image collection - now and in the future!
Then in Edit Like A Pro in Lightroom Classic before going over a full Lightroom editing workflow, step by step. (And unlike many other courses, I don’t just show you how the tools work, I show you how to look at an image to see what it NEEDS, so you TRULY learn to edit) Every single action has been detailed, so you can fast track your learning, and start getting the images you want, today (and in less time 😉)
Just want a little taster before you dive in to these courses? Then grab our FREE Lightroom Classic Starter Kit and get a guide to importing, a step by step editing checklist, and an exporting cheat sheet….all for free!