
5 Ways Using Lightroom Classic Can Save You TIME
I know that for many of you, the number one enemy in your photography journey is not having enough TIME! I can totally relate to that, as I sometimes feel like I am trying to cram 50 hours worth of chores into one day....and never quite managing to feel on top of things!
I have spoken before about how I try to manage the time I do have for photography more effectively, and today I'm going to tell you why Lightroom has been a key part of helping me get more done, in less time.
Music to your ears? Read on.....

Without further ado, here is the five main ways that Lightroom Classic has helped me claw back some much needed time into my life!
#1 - Save time by editing multiple images together
One of the greatest things about using Lightroom for editing your photos is the ability to quickly apply the same edit settings to multiple photos. I'm putting this right up there at number one, because this alone can save you so much time.
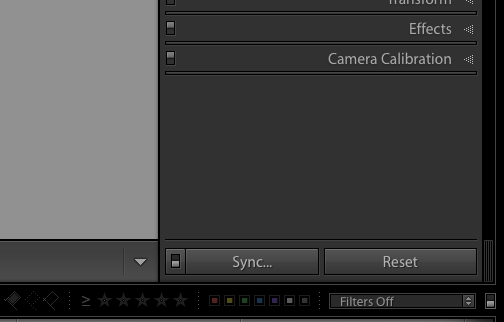
Let's say you took 20 images of your children playing together in the garden. The light and the exposure is the same, and you will want to edit the entire set of photos in the same way. In Lightroom, all you need to do is make your adjustments to ONE photo, and then, when you have it looking the way you like, "sync" the edits over to all the photos in the set. Lightroom pretty much instantaneously copies over everything you did to that one photo, over to those remaining 19 photos, and you don't need to do another thing. That's twenty photos edited in the time it takes to do just ONE. Of course, you may wish to go into each photo individually to "tweak" it, but the main bulk of your editing work has been done for you.
Let's compare that to how I used to edit, back when I was using Photoshop exclusively. In Photoshop, the first thing I would need to do is open twenty different files (time consuming to begin with!) and then make my edits to one image. Unfortunately, there is no quick way of copying that adjustments onto the remaining files. I could either do it by copying the layers and pasting them individually onto each image, or I could record my editing steps on the first image as an action, and then running that action on the remaining images. It doesn't matter which way I did it, as all require you to edit each image individually, simply because that is how Photoshop works!
This ability to work on images in bulk is really such a timer saver, but it is just ONE of the ways you can save time in Lightroom Classic, so let's crack on with number 2.

#2 - Save time by using Presets
Another huge time saving feature of Lightroom is the ability to use Presets.
Presets are simply a way of editing an image with just one click. So, for example, if you always add a little exposure, vibrance and contrast to most of your images, you can create a preset that does all that for you with just one click, instead of having to move all the sliders individually each time. As you can imagine, you can save loads of time using these! You can create your own Lightroom Presets or buy them in.
Wondering how these differ from running an action in Photoshop?
Well, they are exactly the same in that they apply a predetermined set of steps to your image, but in terms of speed, presets are way, way faster. That's because Photoshop actions take quite a few seconds to apply (or much longer depending on how many "steps" are in the action) because it has to run a script, step by step. This is fine for one image, but if you are working on twenty images, then that time adds up as it has to run the same script for each and every image. (Remember, Photoshop can only work on one photo at a time!) In comparison, Lightroom presets are applied pretty much instantly, as soon as you click the mouse.

I have presets that I have created that gives me an instant edit with just one click, and "tweak" presets that allow me to add different elements such as vignette, or sun "glows", and I use these all the time!
In my step by step program Edit Like A Pro in Lightroom Classic you learn HOW to edit, and then speed it up by using presets!
#3 - Save time by getting Lightroom to do the work for you on IMPORT
Moving along, let's look at yet another way Lightroom saves you time: by getting it to do the bulk of the work for you!
When you upload your images from your camera to your computer using LIghtroom, you can get Lightroom to do loads of things for you at the same time. For example, you can change the filename, apply keywords and even add an editing preset at the same time as you upload your images.

That is exactly what I do when I upload my images. I change the file name, I add a develop preset, and add keywords, all upon upload. All that can be left for me to do is cull, and maybe tweak the edit depending on how much I feel like doing to that particular set of images.
Again, such a time saver because I spend just a couple of minutes getting the settings right in the import dialogue box, and when I come back half of my work is already done :)
#4 - Save time by having a "end to end management" solution
So far we have only really looked at how Lightroom saves you time editing, but there are so many other features within Lightroom that will help you shave off a few hours in front of the computer.
Although I could have gone on to list each of one these elements with their own little #number, in the interest of saving you some time reading this blog post I've condensed it into just one: having an end to end management system.
Here is what I mean by that.
First of all, think of Lightroom like your control room for your images. This is where you will manage all the aspects of them - you can save them into different collections, or see all of your images at a glance, plus be able to easily find your images again. You can also see all your different versions of an edit, plus so much more.
But, let's just look at one aspect now, which is what you do once you have finished editing your images. I'm guessing you are probably going to want to use them in some way! You might want to create a photo book, a print, a slideshow, or maybe you are going to upload them to a photo site like SmugMug so you can give your client online access, or maybe you want to share them on your Facebook page or on Instagram.
You can do ALL of this directly from within Lightroom.

Let me take my workflow as an example.
After editing, I'm ready to use my photos. Inside Lightroom, I send full sized JPEG's to SmugMug as my off site photo back up (I don't have to create the JPEG's to do this, Lightroom does it all automatically) I also send images sized for the web to Instagram. I then add the photos into my photo book spread for my yearly photo book, and I may export a few for sending to my chosen printer. I can do all this just within a few minutes.
Again, let me show you what I USED to do when I used Photoshop. I would have to save a PSD file for each image so that I had a edit saved that I could go back into and tweak at a later date (as a side note, there is no need to do this with Lightroom, all your editing steps are automatically saved in the catalog) I would then have to run off a copy for my full sized JPEG's - creating a copy of my PSD file as I did it so I could apply a sharpening layer. I would then have to go and create yet another copy for sharing online. I'd then have to open up SmugMug and manually upload my JPEG images to it. I'd then have to open up Book Smart, and manually import the images into there too.
Being able to do this all within a few minutes inside of LIghtroom has again saved me hours of time each month, AND means I am not cluttering up my hard drive with a few different versions of the same file.
#5 - Save time by batching your workflow
As I've said before, I don't get great big chunks of time to myself (I wish I did!) so I never normally upload, organise, edit, and manage a group of images from start to finish in one single slot of time. What I do instead is cut the whole editing workflow process into batches, so I'm only doing a little bit of my workflow process at any one time.
Again, just taking my workflow as an example: upload, culling and organising generally happens in one batch, editing in another, and then another batch for actually using my photos at the end.
Lightroom makes it super easy to do this. I don't have to worry about saving files or spending time re-opening files at the different stages of the workflow, as it's all there within Lightroom, automatically saved for me.
I can do everything in one sitting, spread out over a day, or spread out over the week, or even the month, it makes no difference to me or to Lightroom.

Lightroom has been the single best thing I have done for my photography workflow because of these time saving features. Instead of taking ages to edit and manage one "session" from start to finish, I can do it all within minutes instead.
You might think that by reading this I am against Photoshop. Nothing could be farther from the truth! I love Photoshop dearly, and I think BOTH have a place in your workflow. (This is why Adobe have bundled them together in a photography plan - it really wasn't a mistake on their part!) You use LIghtroom Classic for upload, organising, 90% of your editing, and your end to end management. You use Photoshop for those images that you need to edit a bit more, and where it makes complete sense to only work on one image at a time.
I know so many of you struggle with getting the time to fit everything in, as do I, so I hope that this post has at least given you some ideas on how Lightroom can squeeze more time into your day!
If you want to really learn how to get to grips with Lightroom, then grab our FREE Lightroom Classic Starter Kit and get a guide to importing, a step by step editing checklist, and an exporting cheat sheet….all for free!