
How to Create Your Own Export Presets in Lightroom Classic to Speed Up Your Workflow
Hey fellow Lightroom users!
As you are no doubt already aware, in order to use a photo for something we can't do from within Lightroom, such as sending to your favourite print lab, or maybe making a copy to post on your blog, we need to EXPORT it from Lightroom.
Although it's pretty darn quick to export photos from Lightroom anyway, we can speed up this process even more by creating our own export presets, and that's what I'm going to show you how to do today!
Step One: Bring Up The Export Dialogue Box
On the bottom of the left hand side panel, click on Export, or right click on an image and click Export, and to Export again. (It'll make sense when you do it!)

Step Two: Fill in the Export Details
The next thing to do is go through the dialogue box and set it up as you would for your chosen export. For the sake of this blog post, I'm going to make a export preset for a high quality print, but obviously you would put in the settings that make sense to you! .
Here are my settings:
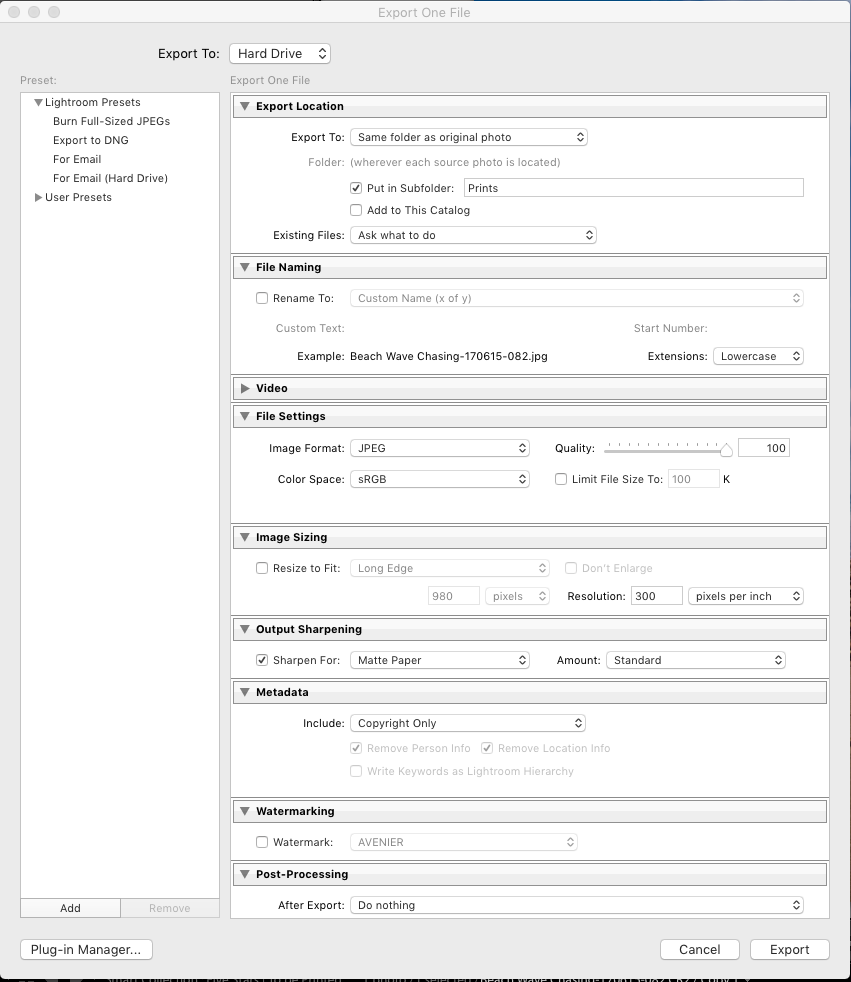
So fill in where you would like the images to export to, in my case to the same folder as the original image, in a subfolder called "prints", and whether you would like them renamed as you do. Add in the file settings, and whether you need the image resized, and any output sharpening.
Always keep in mind that you want these settings to be universal as it is for your template.

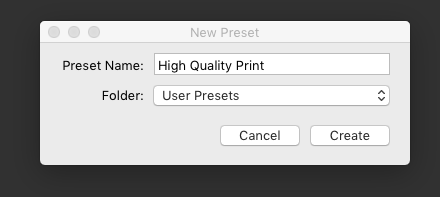
Step Three: Click On Add
On the bottom left of the export dialogue box, click on the button that says "Add" and type in a name for the preset. In this case, I'm naming it "High Quality Print"
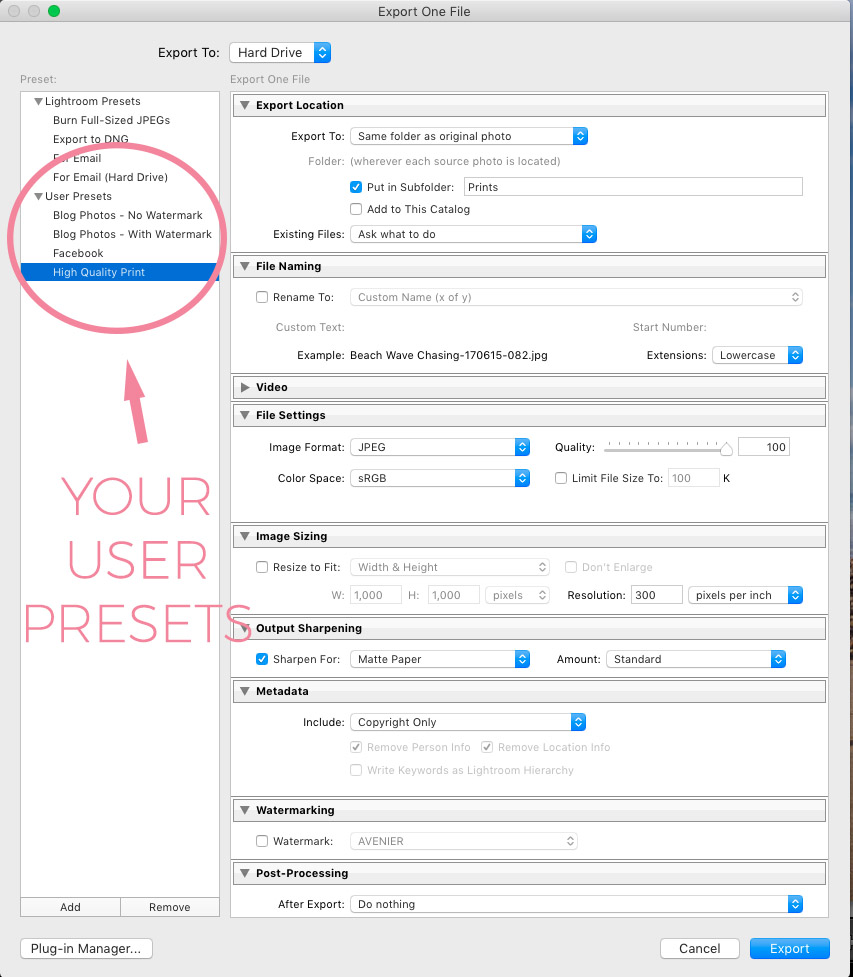
That's it! You've created your export preset.
Now when you go to export, you will see your user presets on the left hand side panel of the export dialogue box, under User Presets. When you click on your chosen preset, it will automatically fill in the data for you, so you don't have to go through it each and every time. All those few minutes spent changing your export settings add up!
Step Four - Create All Your Presets
I suggest you go on to create presets for anything that you export reguarly.
You can create as many presets as you want, so you may want to create a preset for exporting a high quality print, one for exporting for your blog, one for Facebook (although you can post directly to Facebook from Lightroom!) for burning to a CD for clients and so on - whatever makes sense to you and your workflow.
Congratulations! You are now an export Ninja.
Finally, remember that you only need to export images to do something that you can't do within Lightroom.
For example, you can send them directly to Facebook, Instagram or SmugMug without exporting, and even things like creating prints and photo books!